If you don’t know how to read ohms on a multimeter — you’re missing out on a highly useful function of your testing machine!
A multimeter is a versatile tool for far more than one electrical purpose. Most units are capable of measuring the resistance, voltage, continuity, frequency, and current of a particular circuit.
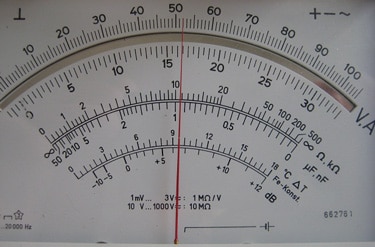
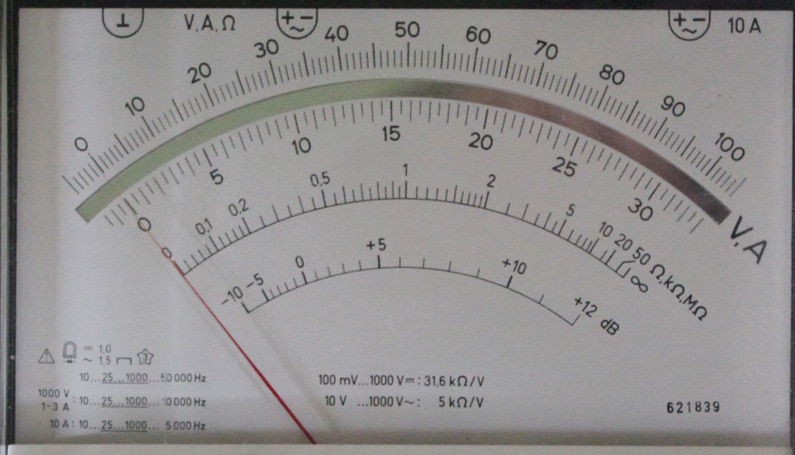
There are two types of multimeters — analog and digital. Thanks to the rapid development of modern technology, the vast majority of popular units today are digital and straightforward to operate.
However, misuse of these units can cause some serious issues. While the biggest danger lies in jeopardizing the inner components of your testing tool — fatal injuries are also a possibility, especially if you decide to neglect safety precautions.
Anyone can use a multimeter, regardless of their previous experience — but always follow the written and unwritten rules to avoid unpleasant surprises.
This article explains why the ohm setting on multimeter is as important for the home DIYer as the trade pro, and crucially, how to test ohms on a multimeter.
The Ohm Reading — What Is It and Why Is It Important?
Ohms and Resistance
Great! You’re reading this article to learn how to read ohms on a digital multimeter! But, so what? If you don’t know what ohms are, or for that matter, why you’re testing them, the whole exercise is pretty much a waste of time! Ohms, symbolized by the Greek letter Omega (Ω) are the units used to measure resistance. So, in the same way that frequency is stated in Hertz and current in amperes — resistance is measured in ohms. In general terms, resistance explains how easy it is for electricity to flow through a circuit. The lower the resistance, the higher the flow — and vice versa. It would be easy to assume that when testing ohms with your multimeter you want to see a high number, right? Because if a circuit isn’t allowing electricity to flow as easily as possible — it must be inefficient. But, that’s not always — or in fact, most usually — the case. Resistance is your friend, and also that of your circuit board.The Importance of Resistance
Consider a spinning household cooling fan. When connected to the mains, 120 volts of electricity at around 15 amps flows directly into the machine. The issue is, every single component in the fan — without resistance — would be exposed to this high energy load. Resistance — and the resistors that provide them in the PCB (printed circuit board) — ensure that all the crucial components only receive the level of energy they need. Furthermore, they stop your fan from going nuclear. The speed control on the fan is, in most circumstances, controlled by a variable resistor. The more resistance, the slower the fan rotates — the lower resistance, the faster the fan spins. Well, up to a point. There’s a lower resistance limit, preventing your fan from blasting air through your house like a tornado — or shearing the fan blades off the unit. An ohm check can be conducted on any electrical component, machine, or circuit, to check the resistance levels and ensure they are within the limits expected. Not just protecting the internals from damage — but also guaranteeing you remain safe too.What Are the Reasons for Using a Multimeter To Test Resistance?
Knowing how to read a multimeter ohms means you can use your testing machine to problem-solve a malfunctioning piece of electrical equipment — or ensure it is running correctly to prevent future issues. While the ohms setting on your multimeter can be utilized for a multitude of applications — the most common reasons are to:
- Ensure that the circuit is functioning efficiently.
- Check that correctly rated components are positioned in the circuit board.
- Search for faults or malfunctioning parts.
- Confirm that the electrical equipment meets safety regulations.
- Troubleshoot broken or impaired electrical machinery.
- Guard against internal overheating.
- Check loads aren’t going to cause you physical harm.
- Protect components from high-load damage.
- Search for parts, wires, and components that are beginning to fail.
- Measure the power consumption of the electrical machine.
How To Check Ohms on a Multimeter
The following steps explain how to test ohms with a digital multimeter — the most common and popular format of electrical tester. If you have an analog unit, the process is very similar — but refer to your manufacturer’s instructions for any particular nuances.
Testing for Ohms on a Multimeter
- Make sure the machine or circuit board is disconnected from all power sources.
- If your circuit includes capacitors — discharge them! Failure to do so could lead to a false reading, or cause you physical harm.
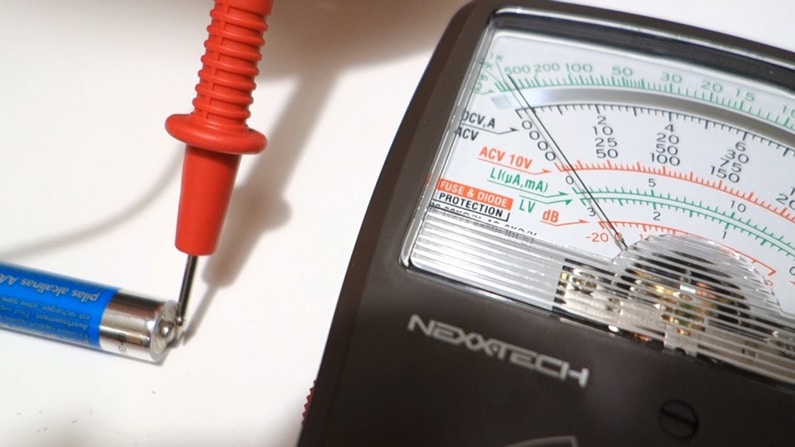
- You should already know how to set your multimeter to ohms — if not check the manufacturer’s manual. Usually, it means turning the dial to the Omega (Ω) symbol.
- Insert the black testing lead into the jack port marked as COM.
- Insert the red testing lead into the ohm input jack port — depending on your make and model, this could be indicated by mAVΩ or just VΩ.
- Switch on your multimeter.
- Immediately, the LCD screen may display OLΩ — since as soon as the machine is activated, it begins to look for resistance. The OL indicates an Open Loop — that is, there is no complete circuit found, as you haven’t touched the probes onto anything yet.
- Alternatively, some machines — especially auto-ranging units — may display MΩ. This means the multimeter is automatically using the highest possible scale of megaohms — as it considers the open loop to have incredibly high resistance, as it cannot detect any current flowing.
- Before I get onto how to check ohms — you first need to know how to select the range (unless your multimeter is auto-ranging). In most circumstances, repeatedly pressing the RANGE button will cycle through the different levels.
- Ideally, you should know what result you expect from the test, therefore indicating what range to use. If not, find out — otherwise, the result will mean nothing to you anyway. But, if you literally have no idea and haven’t the time to find out this information immediately, set the multimeter on the greatest range first, and test — then reduce as required. This will prevent accidental damage to your unit.
- With the unit on, leads connected, and range set — it’s time to learn how to check for ohms on a multimeter. And, it’s easy!
- Locate the probes on the area/component being tested. This may mean touching either end of a wire, each leg of a diode, or the endpoints of a solder pathway. It makes no difference which probe goes on either end.
- Look at the result on the LCD screen. If required, and your machine has the option, press the HOLD button to retain the information.
- Once you’ve finished your ohms reading, switch off your multimeter. Unplug the red testing lead and then the black. Store safely for future use.
- Congratulate yourself! You now know how to test for ohms on your multimeter!
Other Useful Advice for Using an Ohms Multimeter
Switch It Off When You’ve Finished Checking Ohms!
Not just to save the internal batteries from unnecessary depletion — but also to increase safety. It prevents the next person who decides to use the unit from getting shocked with high currents — as the ohms scale range is set too low. Also, some meters can break if they get a sudden blast of current flowing through the inner circuit. Admittedly, some models don’t feature an OFF button. Now, while it seems pretty harmless and irrelevant, it’s very important that you set up the multimeter for future use. For example, if your unit doesn’t have an OFF button, put the scale on the highest value once you’re done with the measuring.Read the Manual About How To Test for Ohms on Your Multimeter Model
Make sure you always read the included user manual, regardless of your previous experience. While a vast majority of meters work on pretty similar principles, some are slightly different. It’s not necessarily a substantial difference, but it can yield different results on some occasions.Remove the Component Before Using an Ohms Test Multimeter
If possible, it is safe to do so, and you have the relevant knowledge — remove the component to be tested from the PCB before attaching the multimeter probes. While it remains in situ, results can be impaired by other parts of the circuits running in parallel with your target component.Avoiding Contaminants
In addition to the above, other issues can skew your multimeter ohms test. Dirt and detritus, dust, dead insects, old solder, machine oil, or flux can all increase resistance — so ensure the area you’re testing is clean. Furthermore, make sure that when applying the test probes, your fingers or clothing do not come into contact with the metal points — as again, this can increase the electrical resistance reading.How To Read Ohms Conclusion
You now have a full understanding of ohm readings — and how to test resistance on your multimeter!
As you’ve discovered, utilizing a meter isn’t a big deal whatsoever. Many people get reluctant when it comes to measuring resistance because of the involved risks. While there is always a chance of something going wrong, one can significantly reduce the potential risks by following safety regulations and using the unit properly.
Most failures happen due to human error instead of faulty instruments. Therefore, before you start measuring different circuits, make sure that everything is set up correctly, or else you risk jeopardizing the whole process.
Needless to say, always take care of your own safety. Whether that means checking everything twice or repeating the process, it doesn’t matter, don’t lose focus, and always stay vigilant around live circuits.
If you can, always have a partner by your side if you’re dealing with high voltages so they can react promptly and accordingly if something goes wrong. Pay attention to the CAT rating on your meter and make sure you’re using a suitable device for the occasion.
I hope you enjoyed this guide and found the information useful! If you have a friend you believe would benefit from learning how to read ohms on a multimeter — please feel free to share!


