In this article, we’ll show you how to properly utilize your faithful circular saw to accurately cut pieces of plywood and longboards.
Required Tools
- Circular saw
- Hammer
- Jigsaw
- Corded drill
- Drill bit set
- Tape measure
- Sawhorses
- Safety glasses
- Spring Clamps
Required Materials
- Two 1/4″ washers and carriage bolts
- Four 7/8″ screws
- Four 5/8″ screws
- Two Wings Nuts
- 1/2″ plywood scraps
Overview
Even if you engage in DIY woodworking only occasionally (once a week), you will eventually have to take a sheet of plywood or a longboard and cut a narrow piece out of it – it’s unavoidable. Those that own a table saw will find sawing longboards an easy task, but the owners of the circular saws can do just as good a job. As far as we’re concerned, cutting long pieces of plywood is actually a lot easier with a circular saw – one doesn’t have to wrestle with pushing unwieldy sheets of plywood through his table saw.
Of course, a circular saw can’t cut as smoothly as the standard table saw, but if you use a bit of finesse and a few techniques, you’ll be able to cut almost as accurately. Sounds impossible? Well, it actually is possible – the professionals do it all the time! We’ll help you find out how to accurately cut boards with a circular saw and show you how to make some handy cutting guide attachments.
Sawing Boards Freehand
For the beginning, let’s take a look at the quickest way to cut a couple of 2″ to 4″ strips. A word of advice, though – if you’re cutting narrow strips very often; scroll down and see how to make a jig for the thin strips.
For this method, the first thing you’ll have to do is to nail down the board directly onto your sawhorses – use finish nails. To be more precise, we advise you to use 4D nails for the 3/4″ thick boards or 8D ones for the 1-1/2″ wood. Use a pen to mark the wood and then cut it to the width.
This method will leave you with a board with parallel sides and consistent width, no matter if the original material was crooked or straight. Those that need to make a straight edge on their crooked board will have to mark the wood with a chalk line or a straightedge instead.
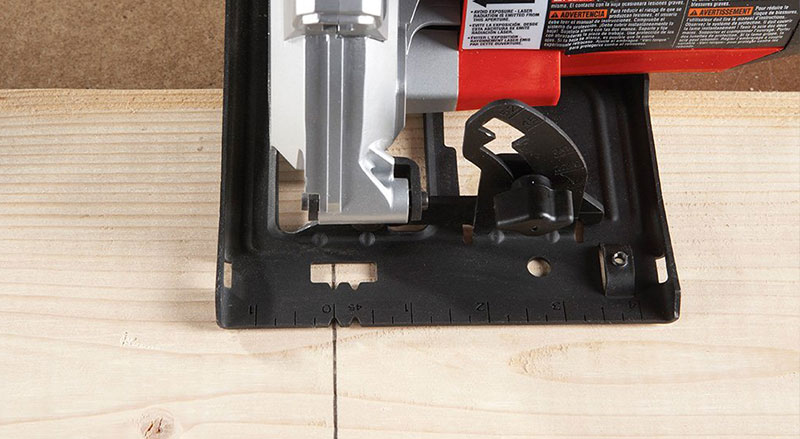
Put your hand on the saw shoe’s broad section (not on the narrow area that’s near the blade) and then grip it with your thumb and forefinger – the forefinger will be your guide. As you’re cutting, you’ll have to direct the pressure straight ahead through the saw’s handle while at the same time concentrating on the line. If you notice that the saw is wandering away from the line, you’ll have to back up some 6″ behind and start over again.
Before pressing the switch in order to restart the cutting, one has to make sure that the blade is in perfect alignment with the kerf. Also, it’s imperative to maintain a firm grip, since the blade can catch the wood and then jerk the saw. A good follow-through is a way to get to an accurate finish.
A word of advice, though – don’t try to use this method if your piece of wood is a splintery one, or if your finger has to be closer than 3″ to the blade.
Cutting Plywood with a Straightedge Guide
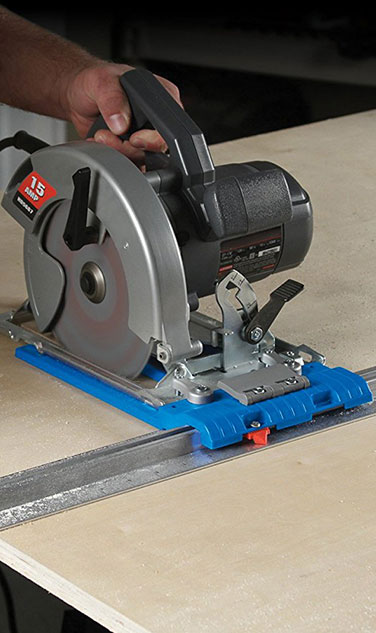
Start by clamping a metal straightedge (or a perfectly straight wooden board) to a sheet of plywood in order to achieve the cabinet-quality straight cuts. The most important thing here is to align your straightedge at a precise distance from your cutting line and then keep the saw shoe firmly pressed to the straightedge as you’re cutting.
Always make a test cut and then carefully measure the distance between the blade’s edge and the shoe’s edge. Record the dimension for reference and offset the straightedge from your cutting line by the measured distance.
When you begin with the cutting, you should use the blade to nick the plywood and thus make sure that the blade is just touching the outside edge of the mark. If necessary, you can adjust the cut by slightly moving both ends of the straightedge, and then re-clamp it. At the very beginning of the cut, one should always press the saw shoe’s frontal part against the straightedge. On the other hand, keep the shoe’s back tight until you get to the finish at the end of the cut.
An additional tip – clamp your straightedge on the piece of wood you intend to keep. In this way, the part you’re saving won’t be ruined in case the saw wanders away from the straightedge.
Building a Ripping Guide
In case you’re not an owner of a table saw, you can, fortunately, create a guide and simply attach it to your circular saw. It will assist you in cutting narrow strips (between 1/2″ to 6″ wide) with accuracy and precision. It takes around an hour to build one, and you’ll probably have to modify it so that it fits your saw’s shoe.
Start by cutting the plywood pieces and the base, and make sure that they have square corners and parallel sides. Make the blade guard, hole for the blade, and the slots by drilling the 3/8″ holes in the corners, after which you can cut between them with your jigsaw. Once you’re done, place the base over the fence and get it aligned with one long edge.
After that, you should be able to snug the rails up to the base’s sides and then get them screwed to the fence with your 7/8″ screws. Your fence assembly should slide easily and fit snugly. Now, use the carriage bolts to connect the fence to the base and then use the small screws to attach the saw shoe to your base. Drill some 5/32″ holes in the saw shoe and then simply attach the guide by using the 5/8″ screws.

The Safety
With these handy attachments, cutting straight lines with a circular saw should no longer be a problem. However, it’s still vital to take all the safety precautions before using this power tool – you don’t want to be left with a severe injury just because you were too hasty!
How to Cut Safely
Before you start with the cutting, it’s essential to place the sheet or the board onto a stable surface – the item being cut needs to be secure and the section being cut away shouldn’t bind during the cutting.
The Depth of the Cut
The Blade Guards
Don’t use anything to prop it into an open position, as that can leave your blade exposed.
The Safety Equipment
Conclusion
Achieving perfectly straight cutting lines with a simple circular saw is not impossible – one only needs to use a bit of finesse and utilize some handy techniques. With the above described attachments, you’ll be able to cut flawlessly accurate lines and give your DIY project a look that you always wanted. We wish you good luck!


