Are you confused about how to use an autoranging digital multimeter? Or for that matter, have no idea what it means and why it’s important?
Don’t worry — I have the answers!
More and more people are investing in autoranging multimeters since they offer a straightforward method of measuring voltage, current, frequency, and resistance.
An auto range multimeter allows you to use the device without needing to manually adjust knobs and buttons — and with no prior knowledge of electronic or electric power ratings.
That’s why I’ve created this new Tool Nerds article, to help you learn not only how to use an autorange digital multimeter, but also its many advantages.
While there are pros and cons to all the different types available, it’s essential to understand why the autoranging multimeter, in particular, gives a wider range of benefits to a larger group of people.
What Is an Autoranging Digital Multimeter?
Many of the best multimeters include autoranging — a feature that makes the process of electrical measurement simple.
It allows the unit to automatically choose the most suitable range dependent on the circuit being tested. This means you receive the most accurate readings — even with no prior knowledge of the measurement magnitude.
Thus helping you in your diagnostics, preventing damage to the multimeter, and eliminating the hazard of user error.

Autoranging Multimeter — Example of Use
As an example, let’s say you need to use your multimeter to test the ohms on an electrical resistor. The rating of a resistor is indicated by the number and color of the bands encircling the component. And, like most people, you probably have absolutely no idea what they mean.
You could search the internet, find a relevant page that explains the banding, decipher the rating of the resistor, and cross your fingers in the hope that the author knew what they were writing about. And, when your multimeter blows up in your hands, and you suffer third-degree burns — you discover he didn’t.
That’s why autoranging multimeter units exist, to help you find that range and decipher that code when you’re stuck in a rut — with no prior knowledge.
The autoranging digital multimeter accomplishes this by investigating the signal and then determining the measurement range. So, if the resistance is low — the machine will select a low range. If the resistance is high, the auto ranging multimeter will switch to a high resistance range.
Furthermore, this auto feature doesn’t just protect you and your machine — it also gives the precisest reading possible to the most decimal places. You don’t have to worry about whether you should use milli-ohms, ohms, kilo-ohms, or megohms — the auto range multimeter decides for you.
Let’s take this example one step further and say that the resistor would output a resistance readout of 20MΩ ±5%. Without knowing the range, you may be starting to measure the resistor anywhere from 0Ω-200Ω up to the highest range, which is 2MΩ-20MΩ and the correct range for our example. The ohmmeter would have to be switched five times before you found the accurate result.
With an autorange digital multimeter, however, you can simply switch your notch to a resistance reading setting, which will automatically find the color code associated with your resistor and provide lightning-fast readings. This saves a lot of time and hassle!
What Are the Advantages of an Auto-Ranging Digital Multimeter (DMM)?
No matter what kind of multimeter you own — simple or advanced — you’re sure to find a lot of value in it. However, an autoranging digital multimeter has numerous inherent advantages that marks it out above its more basic counterparts:
- No Need for a Ranging Tool — the auto range digital multimeter is everything you need in one unit, saving you money.
- Time-Saving — you don’t have to work through a multitude of metrics before you find the correct range.
- Precision — by automatically selecting the ideal range, your results are accurate to the most decimal places possible by the auto-ranging digital multimeter.
- Straightforward to Use — you don’t need to know anything about circuit testers or electricals to operate an auto ranging multimeter.
- Versatile — a multimeter with auto range will determine the correct metric on current, voltage, resistance, and frequency.
- Safety — you’re unlikely to damage yourself or your machine as the correct range is being utilized.
- Error-Proof — By using the correct range, it eliminates user error.

What Are the Components of an Autoranging Multimeter?

Display Unit
The display unit gives a digital multimeter its name. It usually displays up to four digits at a time, and can also display a negative sign during certain types of readings. It’s a simple display screen, much like that of a calculator — although more advanced brands may come with illuminated backlighting and multi-functional displays for better viewing and understanding.
Selection Knob
The selection knob is where the magic happens. This is where you can set your autoranging multimeter to read different measurements, like resistance and voltage. While your autoranging meter can detect these readings automatically, you still need to set them to the correct reading type to get them to work.
Ports
The ports are the most technically-advanced part of the multimeter. You will plug two probes into the ports. The two ports are classified as COM, which means “common,” and 10A, which is a specialty port. The COM probe is a black unit that’s always connected to a grounding part of the circuit. This is a necessary step to stabilizing your equipment and your electrical work.
The 10A port is used to measure currents larger than 200mA. Keep in mind that any kind of port with a banana plug will be compatible with your digital multimeter. This means that your autoranging multimeter can take over 10 types of probes!
Some of the most common types of probes available for autoranging multimeters include:
- Banana to Tweezers.
- Banana to Test Probes.
- Banana to Alligator Clips.
- Banana to IC Hook.
How To Use Your Autoranging Digital Multimeter — Step-by-Step Guide
- A multimeter.
- A circuit or component to test.
- Protective clothing — especially if working with high voltage/current and live circuits.
Step 1
- Turn off the circuit you’re planning to test, if possible. However, if your test requires power throughput — ensure you’re wearing electrical protective clothing.
- Rotate the dial to select the type of test — voltage, current, frequency, or resistance — and whether it is AC or DC. Refer to your user manual for this information, and check out my guide to multimeter symbols.
- Grab your black testing lead and insert it into the COM jack port.
- Insert the red testing lead into the correct port — refer to your user manual. Typically, it will be mAVΩ for resistance, voltage, and current.
Step 2 — Testing
- Turn on your auto-multimeter.
- Check your multimeter is in auto-ranging mode — most units will default to this setting. If not, switch to autorange by pressing the RANGE button — or however your user guide explains you select this feature.
- Carefully touch the probe points onto either end of the circuit or component.
- Your multimeter will then display the reading on the LCD screen — at the most appropriate range.
- Mentally note, record, or press the HOLD button (if available) to keep the reading on the screen.
- Remove the probes from the circuit or component.
- Switch off the multimeter, disconnect the red lead, and then the black testing probe.
ALWAYS read your multimeter manual before conducting any test — the steps above are intended as a general guide only. Individual makes and models have their own specific nuances and operational features — ensure you know and understand them before using your machine.
Conclusion
When autoranging digital multimeters were invented, it became much easier for beginners and amateurs to learn how to use multimeters. Analog multimeters are often overwhelming at first glance, with too many bells and whistles to learn quickly.
The advent of digital multimeters was essential to the increased performance, efficiency, and knowledge of those who work with electricity on a daily or professional basis. However, the autoranging digital multimeter took it one step further — enabling those people with little or no knowledge of electricals to use one of these amazing units.
At Tool Nerds, we’re passionate about sharing this incredible find with you all. If you work in electricals, you’ll want to invest in this product. Whether you like to build circuits as a hobby, or you need to test car batteries and electrical components as part of your job, you can use an autoranging digital multimeter to achieve accurate results as quickly as possible.
I hope you enjoyed this article, and found the information useful and informative. If you have a buddy whom you believe would also benefit from my How to Use an Autoranging Digital Multimeter guide — please feel free to share!
How To Use Digital Multimeter With Autorange FAQs
Q: What Is Better — Auto Ranging Multimeter vs Manual?
A multimeter with auto range facility means you don’t have to select the correct measurement range as you would with a manual unit. This leads to greater accuracy, prevents damage to your equipment, and protects you against electrical shock.
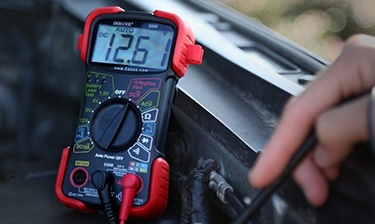
Q: How To Use a Digital Multimeter on a Car?
When using an auto range digital multimeter on a motor vehicle, you need to ensure the dial is set to DC. The unit will automatically select the range — but for users with a manual machine, set the voltage to the 20V setting.
Q: Is Autoranging Expensive?
Autorange multimeters are slightly harder on your wallet than basic manual machines. However, offering greater usability, ideal for novices, and protecting against user error — they often work out as a more cost-effective option.
Q: Autoranging Digital Multimeter — How To Use Safely
My five top tips for safe digital multimeter use:
- Read the user manual before using it for the first time.
- Always examine the multimeter for signs of wear, especially on the testing leads, before applying it to a circuit.
- Ensure your meter dial is set to the correct function — check your manual.
- Check the CAT rating of your multimeter is suitable for your circuit.
- Wear protective clothing — including non-conducting shoewear, gloves, and eye protectors.
Q: Are Autoranging Multimeters Complicated To Use?
No! With the ability to identify the correct measurement range and metric — autoranging machines are easier to operate than their manual counterparts.


