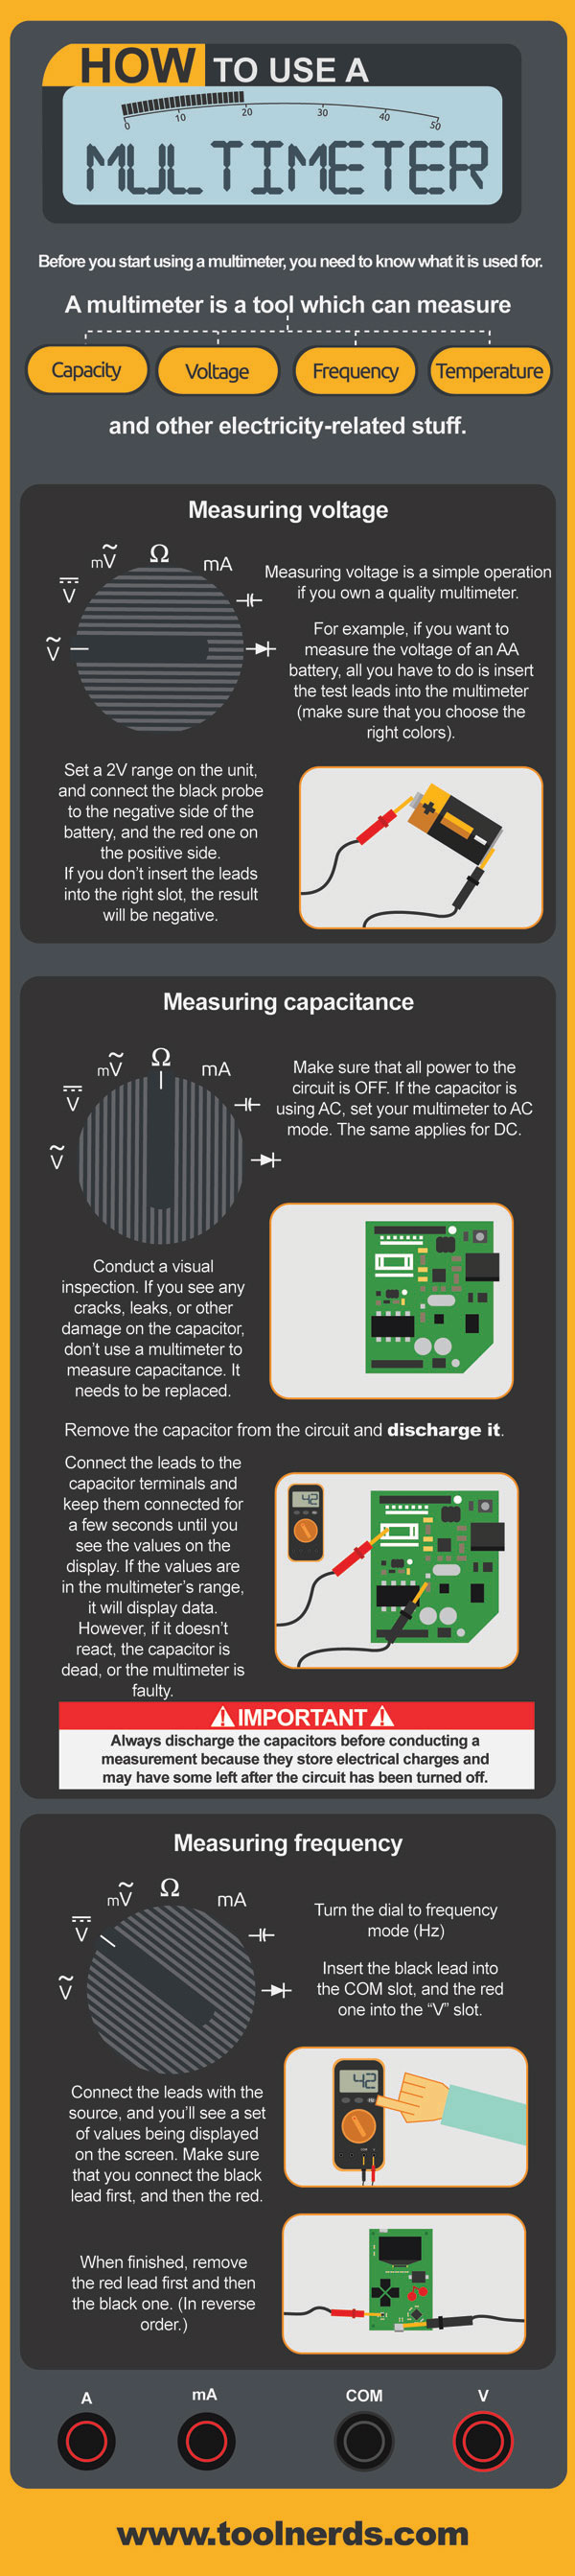
A multimeter is a tool which can measure capacity, voltage, frequency, temperature, and other electricity-related stuff.
Using a multimeter is a pretty simple process, as long as you know what you are doing. If you aren’t sure about the concept of a multimeter, don’t try to use it because you’ll jeopardize your safety and expose yourself to a potentially fatal process.
Measuring voltage
Measuring voltage is a simple operation if you own a quality multimeter. For example, if you want to measure the voltage of an AA battery, all you have to do is insert the test leads into the multimeter (make sure that you choose the right colors). Set a 2V range on the unit, and connect the black probe to the negative side of the battery, and the red one on the positive side.
If you don’t insert the leads into the right slot, the result will be negative.
Measuring capacitance
Testing and measuring the capacitance is a bit of a challenge, especially if you haven’t had an opportunity to do it before.
Make sure that all power to the circuit is OFF. If the capacitor is using AC, set your multimeter to AC mode. The same applies for DC.
Conduct a visual inspection. If you see any cracks, leaks, or other damage on the capacitor, don’t use a multimeter to measure capacitance. It needs to be replaced.
Set the unit to the Capacitance Measurement mode. This mode often shares a spot on the dial with another function; so it may be labeled as “secondary.” If you can’t find the function, refer to the user manual.
Remove the capacitor from the circuit and discharge it.
Connect the leads to the capacitor terminals and keep them connected for a few seconds until you see the values on the display. If the values are in the multimeter’s range, it will display data. However, if it doesn’t react, the capacitor is dead, or the multimeter is faulty.
Measuring frequency
- Turn the dial to frequency mode (Hz)
- Insert the black lead into the COM slot, and the red one into the “V” slot
- Connect the leads with the source, and you’ll see a set of values being displayed on the screen. Make sure that you connect the black lead first, and then the red
- When finished, remove the red lead first and then the black one. (In reverse order.)
IMPORTANT: Always discharge the capacitors before conducting a measurement because they store electrical charges and may have some left after the circuit has been turned off.


