
Graco Paint Sprayer Troubleshooting Guide
While Graco is a world-leading brand when it comes to painting equipment, its products are not infallible, and things sometimes go wrong. Often, there is a quick fix to be had — by following a few simple steps in this Graco paint sprayer troubleshooting guide.
I’ll be answering some of your burning questions about the lack of operation for the most popular Graco ranges — the Magnum line-up and the Truecoat collection.
The Graco Magnum paint sprayers are a popular choice for handymen, home DIYers, and remodelers. These machines are also suitable for professional painters who want an airless electric back up for smaller jobs, so they don’t have to lug heavy equipment around.
The Truecoat collection of Graco paint sprayers are geared for the avid home enthusiast but are also used by pros. Easy to use straight out of the box, they’re great for small interior or exterior projects.
Before we delve into Graco sprayer troubleshooting, let’s take a look at our top picks from the house of Graco.
Graco Airless Paint Sprayer Troubleshooting: Magnum and Truecoat Lines
For ease, I’ll break these tips up into two sections. If your sprayer is from the Graco Magnum line, read on, and if it’s from the Truecoat range, that follows on below.
Troubleshooting the Graco Magnum Line
In this section, I’ll endeavor to answer some of the main questions people ask when their Magnum paint sprayer fails. This includes Graco Magnum X5 troubleshooting and Graco Magnum X7 troubleshooting.
1. Motor is Not Running
You plug your unit in, flip the switch to get started, but you notice the motor isn’t firing up. Here are some possible causes and their solutions.
- Pressure control is set too low — increase the pressure by rotating the control knob in a clockwise direction..
- Faulty electric outlet — test the outlet with a device you know is working. You might need to replace a fuse or circuit breaker or change to another power outlet.
- Damaged extension cord or sprayer electric cord — check the cords for breaks or faults and replace them if necessary.
- Seized pump — this could be due to water freezing in the pump or residual dried paint. Firstly make sure the sprayer is turned off and unplugged, then place it somewhere warm for several hours — do not attempt to start the unit before it’s thawed, or you could damage it. If the unit isn’t frozen stuck, it could point toward hardened paint, which would need cleaning.
- Damaged control or motor, or the motor doesn’t turn with the pump removed — for either of these faults, your unit will need to be serviced by an approved retailer or service center.
2. Graco Paint Sprayer Won’t Prime
Does your sprayer fail to prime or lose prime while in operation? You’ll notice this when paint doesn’t pull through the suction tube or it fails to build pressure. Here are some fixes you can check for and implement:
- PRIME/SPRAY valve is set in the wrong position — the prime/spray valve needs to be in the prime setting and not the spray position to prime. Turn this valve to prime and wait until paint comes out of the drain tube.
- Suction tube isn’t completely immersed in paint, or there is debris on the inlet screen — make sure that your suction tube is right the way into your paint or clean any dried paint and dirt off the inlet screen.
- Jammed or dirty inlet or outlet valve ball — for the X7 or X5 models, press the PushPrime button twice — this should loosen the inlet valve — you can then reprime your unit.
- Leaking suction tube — check the suction tube for a vacuum leak or cracks.
- Debris in your paint is causing a blockage — strain your paint before using and after clearing the obstruction.
- Deteriorated or debris-blocked spray/prime valve — consult an authorized Graco service technician.
3. Issues With Your Spray Pattern
- Partially blocked spray tip — debris and particles can prevent your gun from spraying smoothly. Luckily these models carry an unclog function on the reversible spray tip. Reverse the spray tip to the unclog position, pull the trigger to clear the blockage, and then turn it back again.
- Spray tip is in the unclog position — check that you have the tip set to spray and not unclog.
- Particles in your paint are causing the spray tip to clog up — strain your paint to remove debris and foreign particles.
- Pressure is set too low — check the pressure control knob is in the right place for the spray setting you want.
- Clogged spray gun filter — examine the gun filter and clean or replace as necessary.
- Spray tip is too big for the sprayer’s capabilities — change the spray tip.
- Worn spray tip — replace with a new spray tip.
- Missing or worn gasket and seal on the spray tip — change these parts out for new ones or replace them.
- Suction tube may not be fully immersed in your paint or the inlet screen could be clogged — ensure your suction tube is completely submerged in your paint, or check and clean the inlet screen.
- Extension cord you’re using is not of a heavy enough gauge or is too long to provide the right power — use a suitable extension cord.
- Clogged with debris or worn outlet or inlet valve — to check for these issues, begin by priming your sprayer with paint, then trigger the gun for a moment. When you release the trigger, the pump should cycle and then stop — if it continues to cycle, the pump valves might be blocked with debris or worn. Clean or replace the valves.
- Coating medium is too thick — thin the material according to the manufacturer’s instructions.
- You have added an extra section to your airless hose — you may have extended the hose beyond the sprayer’s capabilities. Remove the added extension.
4. Your Spray Gun Stops Spraying
- The spray tip has become blocked — use the unclog function to clear any dirt or debris.
- Your unit has lost prime — reprime your sprayer.
5. Your Paint is Running or Sagging
- Applying medium too thickly — speed up the movement of the spray gun so a thinner coat is applied. Alternately, choose a smaller spray tip or one with a wider fan pattern. You also need to make sure that you’re using the gun at the right distance away from your target.
6. Coverage is Inadequate
- You’re going too fast — try moving your spray gun at a slower pace for a thicker coating.
- Spray tip is too small — choose a nozzle with a wider opening.
- Fan pattern is too wide — narrow down the fan pattern with a smaller spray tip.
- Target surface is too far away — move a little closer until you reach the finish you want.
7. Fan Pattern is Inconsistent
8. Trigger is Not Working
9. Material is Leaking from the Pressure Control Switch
10. Material Leaks Through the Drain Tube
11. Paint Leakage — Down the Outside of the Pump
12. Motor Issues
- Blocked vent holes in the enclosure — keep the vent holes free from obstruction and away from overspray.
- Sprayer is covered — make sure the unit is open to the air and nothing is draped over it.
- Incorrect extension cord — if you’re using an extension cord, check it’s not too long and is of a heavy enough gauge for the unit.
- An unregulated generator is supplying too much voltage — ensure you use an electrical generator with a compatible voltage for the sprayer.
- Motor needs replacing — if you rule out all the above causes, your motor might be giving up the ghost and needs to be replaced by a Graco authorized technician.
Troubleshooting the Graco Truecoat Line
Utilizing the latest technology, the Graco Truecoat series of sprayers are an excellent choice for the home DIYer or professionals wanting a handheld solution for maintenance work. Here are some tips and tricks you can try for those occasions when your sprayer doesn’t want to play ball.
1. No Sound When Trigger is Pulled
- No power supply — make sure the outlet you’re using has power and that your unit is plugged in.
- An overheated motor — wait for between 20 and 30 minutes for the unit to cool down before trying again.
- The electronic control isn’t working — replace the electronic control.
2. Sound but No Spray
There are numerous reasons why when you pull the trigger, your machine makes noise, but zero material atomizes and sprays. Let’s look at some of the causes and solutions for this.
- Sprayer isn’t primed — make sure you prime the pump and check that there is only one FlexLiner in the cup support.
- Paint cup isn’t properly attached — you also need to ensure that the cap cover on the paint cup is threaded correctly. When it’s attached and tightened, no threads should be visible.
Line up the arrow on the cup cover to the range indicated on the cup support and make sure the whole assembly is hooked onto the sprayer. Finally, check that all the air is out of the FlexLiner and the VacuValve is closed properly — if necessary, clean the VacuValve reservoir and air hole, or even the entire sprayer.
- Prime/spray knob is in the wrong position — turn this dial forward so it’s in the spray position and not prime/pump.
- Spray tip is in the wrong position — make sure the spray tip is in the spray position.
- Spray tip could be clogged — check the spray tip and clean if necessary.
- Debris in your material — foreign particles in your paint could be clogging the spray tip — strain your paint to remove debris.
- Not enough speed from the unit — on variable control models, turn the speed up until the unit sprays — and dual control machines, set it to high.
- Material in the cup is running low or has run out — refill your FlexLiner and re-prime the system.
3. Inconsistent or Poor Finish
You expect a flawless finish from your Graco Truecoat sprayer, but it’s not delivering. Here are a handful of reasons this could be happening and what you can do about them.
- Partially blocked spray tip — clean old dried paint out of the spray tip.
- Your spray tip is in the wrong position — make sure your tip is set to the spray position.
- Spray tip size isn’t compatible with the medium — change out the spray tip to a larger one for viscous materials and a smaller one for thinner paints.
- Using a worn or damaged spray tip — replace the spray tip.
- Aerated medium — ensure your material is stirred and not shaken.
- Paint temperature is too cold for use — warm up the material before trying to spray it.
4. Leaks from the Trigger Area
5. Leaks from the Paint Cup
- Ensure there is only one FlexLiner in your cup support.
- Check that the cup cover is threaded correctly on the cup support — no threads should be visible. Remove and reseat the cup, if necessary.
- An arrow indicates the cup cover is in the correct range — check that this is in the right place.
- When you’re trying to evacuate air from the FlexLiner, try to avoid pushing or flexing on the cup support — and try not to pull down on the FlexLiner.
- Examine the cup cover gasket and FlexLiner for damage or dried paint and debris. If you find either, replace the FlexLiner.
6. Pulsating Spray Pattern
If, as you spray, you notice dark and light patches evenly appearing — leaving your finish looking a bit like the beat on a heart monitor — your spray pattern is pulsating. Here are some techniques and tips that could correct this.
- You’re moving too fast — slow down your movement with the spray gun.
- Clogged spray tip — clean your spray tip to remove any blockage.
- Your sprayer is struggling to atomize your paint — turn up the speed on your unit, or hold the sprayer further away from your target. You could also switch to a wider 12-inch spray tip.
7. Tailing Spray Pattern
Tails are great on cats, but you don’t want to see them on your paintwork. If you’re noticing thicker lines of paint at the edge of your fan pattern, this is tailing. There are some things you can do to combat this, which include:
- Turn up the spray control. If it’s set too low, tails can be the result.
- Thin your material according to the manufacturer’s instructions, it might be too heavy for the sprayer.
- Check that you’re using the correct size spray tip for the fluid you’re trying to dispense.
- The material you’re attempting to apply might not be compatible with the sprayer — select another type.
- Your spray tip has become too worn or damaged to spray effectively — change it out for a new one.
8. Dripping or Sagging Spray Pattern
- Speed up a bit when spraying — you could be moving the gun too slowly.
- Move the sprayer away from the target surface — you might be too close. The recommendation is about 10 inches away.
- Release the trigger when you change directions — if you keep it depressed, you will end up with runs and sags.
- Turn down the speed control until the fan pattern is correct.
- Check out whether your spray tip is damaged or worn and change if it needs it.
9. Overly Narrow Spray Pattern
- You’re too close to your surface — back up a touch. The ideal distance to hold the sprayer away is around 10 inches.
- The size of the spray tip isn’t suitable for the medium you’re using — try an alternative. A worn or damaged spray tip will require replacing.
10. Overly Wide Spray Pattern
- You are too far away — move closer to your target surface.
- The spray tip you’re using isn’t compatible with your chosen coating — select another one.
11. Spitting at Start or End of Spraying
- Build-up of material on the spray tip guard or the spray tip may have a partial blockage — clean the spray tip guard and spray tip.
- The spray tip is not completely inserted into the spray guard — ensure your spray tip is fitted correctly in the guard.
- Spray tip needs to be changed — a worn spray tip won’t dispense paint well — replace it.
12. Dripping or Oozing Spray Tip
- Your spray tip could be worn and needs to be replaced.
- The spray tip is not correctly inserted all the way into the spray tip guard.
Graco Support
Hopefully, our troubleshooting guide will have ironed out any issues you might be having with your Graco paint sprayer. However, there are times when you need technical support from the manufacturer.
The brand also produces some useful videos to help you work your way through Graco paint sprayer troubleshooting issues, like this one for the Magnum range or this for the Truecoat series. You will also find handy information in the manual that accompanies your machine for cleaning and maintenance.

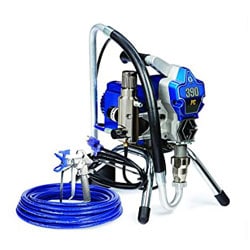
Our Rating: 4.9
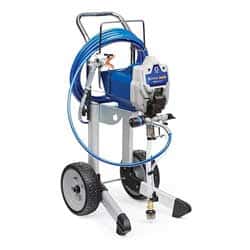
A true powerhouse suitable for a dedicated home-improver or professional tradesperson, this sprayer offers a 0.63 horsepower motor that can deliver the most dense of materials at 0.47 gallons per minute. It boasts a robust stainless steel piston, a ProConnect system allowing rapid pump replacement and low-noise operation.
Features
- 3300 PSI.
- Airless hydraulic pump.
- 515 size spray nozzle.
- 50-foot hose.
- Continuous pressure control.
Graco Paint Sprayers — Our Top Picks
| IMAGE | PRODUCT | DETAILS | ||
|---|---|---|---|---|
|
Features
|
Check Price at Amazon Nerds Review Nerds Review | ||
|
Features
|
Check Price at Amazon Nerds Review Nerds Review | ||
|
Features
|
Check Price at Amazon Nerds Review Nerds Review | ||
|
Features
|
Check Price at Amazon Nerds Review Nerds Review |


