
Your garage is a sanctuary, a place that you can truly make your own. Many homeowners like to transform their garages into offices, workout spaces, large tool sheds, automotive spraying booths, crafting stations, and much more. No matter what you use your garage for, the odds are you want it to look good.
Think about painting the floors and the ceiling of your garage as well. This isn’t just about the walls! For a complete transformation, make sure you have all angles considered.
Before You Begin

Ask yourself the following questions:
After you’ve figured out where to relocate your possessions, it’s time to start the process of moving them out completely.
Then, once everything is cleared and you’re left with an empty garage,
you can start the next steps of the interior painting process.
What You Need to Follow This Tutorial
Ensure you have all the necessary tools and materials ready to hand prior to commencing your painting project. This will cut back on the downtime, and allow you to crack on with your job without interruptions.
While not an exhaustive list, I recommend preparing:
- Wood filler.
- Spackle.
- Patching compound.
- Dust mask, safety goggles, and painting gloves.
- Drywall compound.
- Bleach and bucket.
- Stiff garage brush.
- Sandpaper.
- Power washer and detergent.
- Hose.
- Suitable paint sprayer — such as the HomeRight 2800 or FLEXiO 5000.
- Floor degreaser.
Put on Your Protective Clothing
Look for Damages and Repair Needs
Once the filler is dry, sand it down to make it flush with the existing surface.

Remove Wall and Ceiling Hardware
Wash the Walls, Floor, and Ceiling
After everything is set, you can move on to the washing process. Using a hose or a power washer, carefully and thoroughly clean your walls, floor, and ceiling to get rid of any dirt — utilizing a gentle detergent. Again, wait until everything is dry before commencing painting.
Prepare to Paint
First, double check you have sufficient paint to cover the garage surfaces — there’s nothing more annoying than discovering mid-project that you have to shoot down to the home-improvement store to finish the job. I suggest utilizing a paint volume calculator to assess your coverage medium requirements — such as one provided by the paint company Sherwin Williams.
You could employ a handheld brush and roller to apply the liquid coat — but if you want the best finish, more fun, and the least amount of effort — I recommend using a paint sprayer.
As the majority of wall, ceiling, and floor coating mediums are dense — you need a unit capable of propelling these viscous paints. Furthermore, unless you have a garage that’s ridiculously small — it’s crucial that you use a machine that can handle larger-scale projects. I suggest checking out the HomeRight 2800 and the FLEXiO 5000.
Start with the Ceiling, then the Walls
Starting with the ceiling is the most logical place to begin, as you don’t need to worry about waiting for it to dry before moving on to the other surfaces of your garage. Check out my guides on How To Paint Ceilings and How To Paint Walls.
When selecting the paint that works best for your garage, there are a few considerations that need to be taken into account. First, consider the existing base paint type. If it’s an alkyd or oil-based paint, you may use a latex water-based paint on top of it.
However, you cannot put an alkyd paint on top of a latex base coat. This is a rule that must be acknowledged before starting your project, or else your garage will become exposed to water damage and other forms of disrepair.
Choosing colors is another factor. A lighter paint color will open up the room and make your garage feel more expansive since it invites natural light and gives you a sense of spaciousness. On the other hand, a darker color, such as gray or blue, gives natural beauty and is also great for covering up eventual dirt stains.
Finally, think about the wall finish you prefer — if you want to go for a wipe-clean surface, an oil-based or enamel paint is better than a latex or acrylic medium.
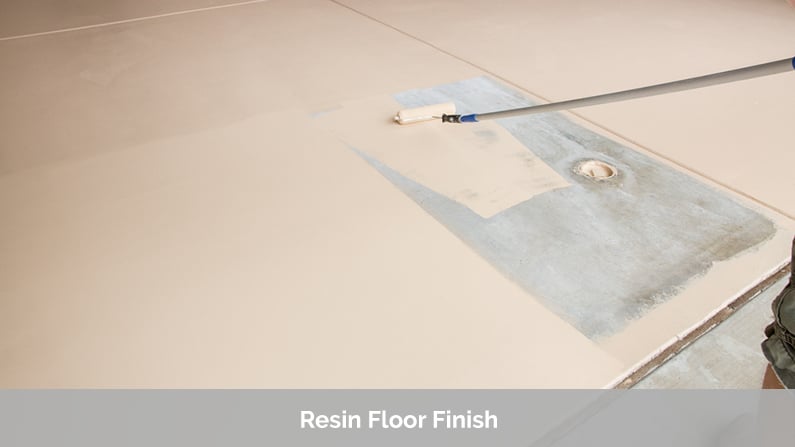
Move on to the Floor
- Invest in a degreaser.As you store your car on the garage floor all day long (well, if you’re normal — with all my power tools, there’s no room for my motor vehicle), the tires and leaky oil spots tend to build up a lot of grease. Scrub the floor thoroughly with this liquid to remove any sticky residue.
- Wash the floor with water, bleach, and a stiff brush. A solution of three parts water for one part bleach will work perfectly to get out stubborn stains and to remove other dark and unwanted spots.
- Get a patching compound to fix cracks in the floor.
- Apply a resin or epoxy finish. This can be found in the form of paint or even a 100 percent acrylic sealant. It will add traction to the floor, while also providing a protective barrier. Ensure you paint your way out of the garage — don’t trap yourself in a corner! Keep in mind that epoxy paint dries extremely fast, typically within 45 minutes of the coat being applied — so try to complete this area without any breaks, to guarantee even coverage.
We recommend a 100% acrylic paint for your garage floor. If you want to use epoxy paint to make it shiny and glossy, you need a catalyst in order to successfully paint the floor with it. Keep in mind that epoxy paint dries extremely fast – typically within 45 minutes of the coat being applied.
Your Work is Complete!
After you’ve removed your items, thoroughly cleaned your floors, painted the ceiling and walls, scrubbed and polished the floor, and applied your final coats of paint, your beautiful DIY project is complete. We cannot stress this enough — wait for everything to dry before putting your items back in the garage.
You can start to move your items in and put them in the locations you desire. Once done, stand back, light a cigar, and you can admire your brand-new paint job. You should be proud of yourself — you painted every surface of your garage!


