
My paint sprayer troubleshooting guide offers you tips for some simple tasks to get you moving in the right direction. Whether you have an airless system or an HVLP turbine unit, you will find ways to solve many issues — such as paint gun spitting, paint sprayer leaving lines, and more.
As these two formats operate slightly differently, firstly, I’ll take you through spray gun problems for airless systems, then move on to HVLP paint sprayer not working scenarios.
Airless Paint Sprayer Troubleshooting
Before I delve into the realms of spray gun troubleshooting, you might want to take a look at our top picks of airless paint sprayers. These complete units are great for beginners right through to experienced painters.
Airless Paint Sprayers — Our Top Picks
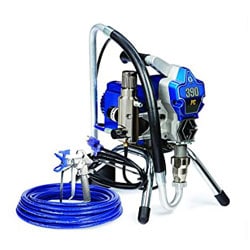
- Long 50-foot hose.
- Stainless steel, chrome-plated frame.
- Ideal for large-scale outdoor work and property renovations.
Product Comparison Table
| IMAGE | PRODUCT | DETAILS | ||
|---|---|---|---|---|
|
Features
|
Check Price at Amazon Graco 390 ProConnect Review Graco 390 ProConnect Review | ||
|
Features
|
Check Price at Amazon Graco 17M359 Review Graco 17M359 Review | ||
|
Features
|
Check Price at Amazon Wagner Control Pro 170 Review Wagner Control Pro 170 Review |
The Complete Guide to Airless Paint Sprayer Troubleshooting
1. Motor Issues
Motor Won’t Fire Up
Turn up the pressure — insufficient pressure won’t allow the motor to operate.
Test your power outlet — maybe the circuit breaker has tripped, a fuse has blown, or the power outlet is faulty. Test it with a multimeter, or plug in a device that you know works.
Examine the electrical cords for damage — if they’re faulty or broken, the juice won’t flow.
Seized pump — frozen water in the pump, or residual dried paint, prevents your unit from operating. Firstly, make sure your sprayer is turned off and not plugged in while it defrosts somewhere warm. After a few hours, try and fire it up — if this doesn’t work, the culprit could be dried paint, so clean the pump.
Damaged motor or control, or the motor fails to work with the pump removed — these faults need the expertise of an approved brand technician.
Motor Stops Without Warning
Keep vent holes clear of obstruction — blocked vent holes prevent air circulation that cools your machine. Be particularly careful to keep the base unit out of the overspray line of fire.
Don’t cover your sprayer — again, keeping your unit cool means no covers of any kind.
Check your extension cord — it shouldn’t be too long and must be of sufficient gauge for your machine.
Use a compatible generator — make sure the voltage of a regulated generator matches your sprayer’s requirements.
Time for a new motor — if you rule out all the above causes consult a certified service center. It’s possible your motor has run its useful lifespan and needs replacing.
2. Paint Sprayer Not Priming
Set the prime/spray correctly — ok, I don’t want to teach you how to suck eggs but check the prime/spray control is set to prime. This is something simple that’s sometimes overlooked.
Submerge the suction tube fully in the material — complete immersion in your chosen coating is necessary for pressure to build and your unit to spray.
Inspect the inlet screen for dried paint or debris — build-up on the inlet screen needs to be cleaned off.
Use the Prime button to clear the inlet valve — some machines feature a Prime button, which releases the inlet valve. After depressing this a couple of times you can reprime and continue spraying.
Clean the inlet/outlet valves — if your model doesn’t have a Prime feature you will need to remove and clean the outlet and inlet valves. Be careful not to lose valve spring or ball when doing this. Once the debris has been removed and replaced, reprime your unit.
Check the suction tube for damage — cracks or a vacuum leak in this tube prevent the unit from building pressure.
Examine the o-ring on the suction cup — if this is worn, replace it — otherwise you won’t get a good seal.
Strain your paint before use — materials sometimes contain dirt, dust, debris, or impurities, so strain your coating before use. If you have an obstruction in your system because of this, clean it before reusing your filtered paint.
Deteriorated or debris-blocked spray/prime valve — seek advice from your sprayer’s authorized service center.
3. Ill-fitting or Missing Seals and Parts
Suction tube is loose — inspect the suction tube and ensure it’s both clean, debris-free and fitted tightly.
Paint container cross-threaded or loose — a paint cup that isn’t threaded properly and sitting tight on the paint gun won’t achieve enough pressure build-up to spray material. Make sure the paint container is attached correctly and nice and tight.
Malfunctioning air valve tube — if you look under the hood of your sprayer, you will find a tube with attachments at either end. This supplies air pressure to operate your paint gun. Both ends need to have the valve seats in place and be connected securely.
Missing nozzle seal — seals sometimes become unseated during cleaning. Check that it’s in place and if not pop a new one in.
Air filter clogged — obstructions in the form of dust and debris can build up in your air filter — resulting in low pressure and zero paint spray. Examine the air filter and clean or replace it.
Spray tip can’t handle the material you’re using — some more viscous materials are too heavy to atomize. When using super-thick coatings, thin them according to the directions on the tin.
4. Material Leaks
Loose spray tip — check the nozzle is both tightened and fitted properly.
Worn nozzle — over time, paint gun nozzles wear and performance drops. If your spray tip has been in use for a while, change it for a new one and see if it rectifies the issue.
Check out the seals on the nozzle — make sure the seals haven’t gone astray when you’ve cleaned your gun. Also, check for wear — old seals won’t do the job they are there for — creating a bond and preventing leaks.
Solidified paint on the air cap or nozzle — a build-up of dried material on the air cap or nozzle can cause leaks. Cleaning it thoroughly should alleviate this.
Seepage from the nozzle — a poorly seated or loose needle allows the material to leak from the nozzle area even when the trigger isn’t engaged. The needle could also be prevented from moving freely by a packing nut screwed in too tightly. Either clean the needle or if damaged, replace it — or loosen off the packing nut.
Wrong size nozzle — using the incorrect nozzle in your spray gun results in paint leaks — make sure you use the recommended size.
Leaks from the paint cup — inspect the gasket for wear and replace if needed. Lubricate below and above the lever for smooth action. Use some Loctite to fix leaks on the nut under the lid, the nipple, or the side pins.
Loose packing nut — a packing nut holds the needle of your spray gun in place — if it’s loose, it will allow fluid to escape. Tighten the nut carefully and oil the needle shaft to help it move easily.
5. Insufficient Material Flow
Clearing out the clogs — components of your system have become blocked with dried paint, such as the suction hose, spray tip, or air vent. I can’t stress enough how important maintaining your unit following each use is, to prevent dried paint causing clogging.
If you were ever wondering, can you leave paint in your sprayer overnight? — the answer is a resounding NO!
Check the settings for pressure, fluid delivery, and airflow — using the correct setting for the coating you’ve selected will keep the paint flowing. Increase or decrease them according to the instructions in your owner’s manual for the material you’re using.
6. Unsatisfactory Spray Patterns
Your material flow is set too high — dial it down a fraction.
The airflow is set too low — crank up the air pressure.
Your spraying technique is too slow — speed up a little to avoid applying too much paint.
The material is too viscous — dilute thicker paints according to the paint manufacturer’s directions.
Spray tip is clogged — examine your nozzle for dried paint, and clean it if necessary.
Worn or blocked air filter — inspect and clean the air filter. Change it out if it shows signs of wear.
Loose paint container — if your paint receptacle isn’t securely locked in place, pressure can’t build and you won’t be able to get a consistent spray. Ensure it’s properly threaded and tightened.
7. Pulsing Spray Jet
Insufficient paint remaining — your material in the paint cup might be running low — it’s time to top it up.
Blocked air filter — your air filter might have passed its sell-by date and become clogged, rendering it ineffective — change it out for a new one.
Unseated air valve tube — ensure each end of the air tube is properly connected.
8. Excessive Overspray
Get closer to your target — holding your spray gun too far away from your surface increases overspray. A distance of 6 to 8 inches should get your paint hitting the target — and not the ceiling, the floor, the furniture, or even the dog.
Reduce air pressure — overspray is increased when there is too much air in the mix. Turn it down — too much airpower increases overspray.
9. Inadequate Coverage
Slow down your spraying technique — speed isn’t always of the essence — moving slower with your spray gun will give you better coverage and ultimately save you time.
Turn up the paint flow — insufficient material emitting from your spray tip contributes to an imperfect finish. Dial it up — a notch at a time — until the coverage is exactly where you want it.
Turn down your air pressure — atomization can be affected by too much air — lower it a touch.
10. Paint Gun Spits
Make sure your spray tip is seated properly — this prevents air from entering the material flow before it atomizes.
Remove debris from the inlet or outlet valves — dried paint or dirt build-up allows air into the system. Clean these valves.
Unclog the spraying and primer valves — blockages in either of these valves require the intervention of a specialist technician for your brand of machine.
11. Pressure Doesn’t Build or Isn’t Maintained.
Check for a worn spray tip — your spray tip naturally deteriorates with use. Change it out for a new one.
Choose a different size spray tip — this is where size matters. You need to ensure the spray tip you’re using is compatible with the material you’re applying — it could be too small or too large.
Increase pressure — not enough air pressure results in an ineffective spray.
De-clog filters — blockages from debris or dried paint in the pump filter, inlet screen, or gun filter need to be removed. Inspect them and clean or change them out for new ones.
Examine the valve — if material escapes from your return hose with the PRIME/SPRAY valve set to spray, pressure can’t be maintained. Exchange your valve for a new one.
Check the siphon/suction tube for escaping air — if it’s leaking, use PTFE tape to seal it, and tighten it up.
Inspect all connections — loose connections result in air escaping where it shouldn’t. Tighten all connections and make sure they’re threaded and fitted properly.
Service the fluid section — dirty worn or dry packings or deteriorated valve balls can cause fluid leaks inside your unit — resulting in a pressure drop. Follow your manufacturer’s instructions to bring them up to speed.
Reverse or replace the valve seats — maintain the valve seat according to your owner’s manual.
Dilute your paint medium to make it thinner — very viscous paints can affect flow and pressure. Either change your spray tip for a larger one or thin down your material.
Filter your paint — straining your paint will remove imperfections such as dust, debris, and particles that can cause temporary blockages and pressure drops.
Use a shorter hose — if the length of your hose is in excess of your requirements, your unit won’t build and hold pressure.
If fitted, clean your filter accessory — not all sprayers come with this accessory, but if yours does, or you have added one, make sure it’s free from debris, dried paint, or dirt.
No motor rotation when powered up — seek the advice of an authorized technician.
12. Worn Piston Pump
Your unit is set up, it has power, and you’re all ready for some paint spraying action — you depress the trigger and nothing happens. If you find there is little or no spray from your gun, try these tips to put it to rights.
HVLP Spray Gun Troubleshooting
HVLP spray guns are a dream to set up and use, making them an ideal choice for newbies to the world of paint spraying. They’re functional and effective, with units to suit all types of work, from hobbies, automobiles, walls, furniture, cabinetry, and more. Here are our top picks of the HVLP sprayers on the market today.
HVLP Paint Spray Guns — Our Top Picks
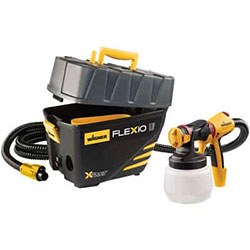
Included in the package are two nozzle tips providing a fine finish and rapid coverage. On-board storage provides the opportunity to keep everything together after you’ve finished painting and cleaned your machine.
- Wagner’s upgraded iSpray nozzle.
- Adjustable spray width and paint flow.
- Lock-N-Go system — offers quick disassembly and cleaning.
- Two paint cups (0.85 and 1.5-quart) provided.
HVLP — Product Comparison Table
| IMAGE | PRODUCT | DETAILS | ||
|---|---|---|---|---|
|
Features
|
Check Price at Amazon Wagner FLEXiO 5000 Review Wagner FLEXiO 5000 Review | ||
|
Features
|
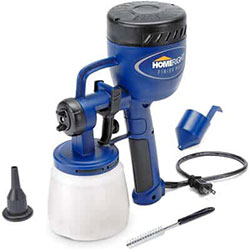
Check Price at Amazon HomeRight Finish Max Review HomeRight Finish Max Review | ||
|
Features
|
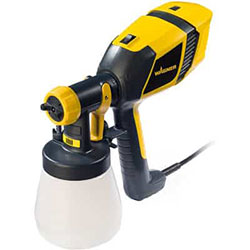
Check Price at Amazon Wagner Control Spray 250 Review Wagner Control Spray 250 Review | ||
|
Features
|
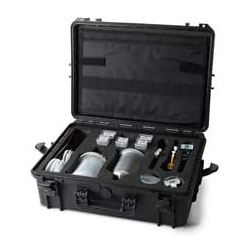
Check Price at Amazon DeVilbiss Tekna DEV-704514 Review DeVilbiss Tekna DEV-704514 Review | ||
|
Features
|
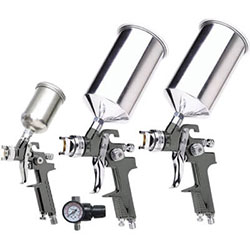
Check Price at Amazon Vaper 19220 Review Vaper 19220 Review |
HVLP Complete Units and Spray Guns
A whole new universe of paint spraying has been opened up to DIYers and professionals with affordable HVLP turbines or compressor-powered machines. Whether you choose a compact handheld gun or go for a powerhouse compressor air-fuelled unit — there are models for any painting project you could imagine. Here are some quick fixes you can employ to keep your machine operational.
Issues that can arise when using these machines vary, depending on whether it’s a complete unit or a stand-alone gun that uses a compressor. I will cover solutions and detail the causes of many different problems you might encounter — the majority of which have quick fixes.
Complete HVLP Unit Troubleshooting
1. No or Little Material Flow
The control knob is in the wrong position — make sure this is set to spray, or the paint won’t dispense.
Blocked nozzle — dried paint and debris can clog up your nozzle. Clean it to eliminate any detritus.
Blocked suction tube — remove the tube and clear the blockage by cleaning it.
Suction tube air vent is blocked — use a soft-bristled brush to clean the vent.
Paint flow is insufficient — crank up the material flow.
Suction tube is loose — ensure the suction tube is tightly fitted.
Paint container fails to build pressure — ensure the paint cup is correctly threaded and tight on the unit.
Fault with the air valve tube — look to see if the valve seal is in place, and make sure the tube is connected securely at both ends.
Lost nozzle seal — occasionally, this seal goes missing when cleaning your unit. Pop a new nozzle on if it’s not there.
Air filter blocked — change the filter out for a new one.
Overly viscous material — follow the manufacturer’s instructions to thin down your coating.
2. Paint Leaks
Tighten the nozzle — if this component is loose, you will experience drips from the spray tip.
Insert a new nozzle — a worn spray tip doesn’t function properly.
Replace a worn or missing nozzle seal — these sometimes come loose and fall out when cleaning your unit, or deteriorate over time.
Clean the nozzle and air cap — dried paint and debris could be affecting their performance.
Tighten the guide nut — it may have worked loose, allowing fluid to escape.
Replace the guide washer — this seal wears with age and is no longer effective.
Loosen the guide washer on the needle — if it’s too tight, the needle doesn’t sit in place as it should.
Check the spring in the needle assembly — if it’s damaged or broken, replace it.
Pop in a new needle — it might be scored or damaged.
3. Runs or Sags Appear in Your Work
Paint delivery is set too high — turn the fluid flow down.
Insufficient air to atomize paint properly — turn up the airpower.
Excess application of material — move quicker with your spray gun or turn the material flow down a few notches.
Clogged nozzle — extract the nozzle and remove any dried paint by cleaning.
Blocked air filter — change it for a new one.
Lack of proper pressure in the fluid container — check that it’s fitted securely and all seals are in place.
Coating is too viscous — thin the material in line with the instructions on the tin from the manufacturer.
Material is not thick enough — you may have diluted your paint too much. Change your spray tip for a smaller size.
Incorrect spraying technique — you could be holding your spray gun at the wrong angle or distance from your target surface. Alter your technique by changing the angle and ensuring you’re spraying from the distance recommended for your machine — usually between 4 to 10 inches away.
Excessive overlap — the recommended overlap is around a third of the width of your fan pattern. Remember to release and re-engage the trigger at returns — to eliminate too much overlap.
4. Spray Jet Pulses
Top up your paint container — your material might be running out.
Change your air filter — it might be clogged with dirt, dust, and debris.
Check the air valve tube — it could have become disconnected, or isn’t tightly fitted at both ends.
Clean the nozzle and needle — this will remove any build-up, but you may need to replace them if they’re damaged.
Examine the paint lid gasket — it may have become detached and gone missing, or could be damaged or dirty. Clean it or replace it.
5. Too Much Overspray
You’re not close enough to your chosen target — you might be holding your spray gun too far away and the atomization is hitting everything in sight. Make sure you spray from the distance recommended for your model.
Excessive air pressure — turn the airpower down.
6. Not Enough Paint Coverage
You’re spraying too fast — paint will be spread too thinly if you employ a technique that’s too speedy. Slow down a little to attain better coverage.
Increase material flow — when set too low, not enough coating is delivered.
Reduce airpower — if it’s too high, your atomization might be too fine.
Inspect your air cap — whether it’s clogged, worn, or damaged, it affects the amount of paint sprayed. Clean the air cap or change it for a new one.
7. Pattern is Heavy on Left, Right, Top, or Bottom
Partially clogged air cap — you can check this by doing a test spray, then rotate the air cap a half turn and spray another test. If the second defective pattern is now a mirror image of the first, there is a blockage in the air cap. Remove the cap and clean it, or if necessary, change it for a new one.
Blocked or contaminated paint tip or air cap seat — remove debris by cleaning the air cap. If you detect fine burring, sand the air cap using 600 grade dry or wet sandpaper.
8. Spray Gun is Spitting
Pick up tube — is it firmly connected and fully immersed in your paint?
Fluid nozzle — is it screwed in tightly? Does it show signs of wear? Secure it or change it out.
Paint cup — is it secure on the paint gun and threaded correctly?
Connecting hoses — are there holes or cracks in any hoses? Are they fitted securely? You might need to replace damaged hoses.
Packing nuts and packing — is the packing nut tightened and the packing free from damage?
HVLP Spray Gun (Pneumatic Units)
1. No Spray
- Is the air supply on? — this might sound like a given — but check your air supply is on, with airlines attached that aren’t damaged.
- Is the fluid needle adjusting screw open enough? — this can prevent the flow of air to your gun.
- Are you using a viscous material with a suction feed? — if the answer is yes, you might need to ramp up the material pressure at the tank and ensure the correct air cap is fitted. Another alternative is to thin down your paint or switch to a pressure feed paint cup.
2. HVLP Spray Gun is Spitting
- Fit the correct needle for the spray gun — select the appropriate spray tip, as recommended by the manufacturer’s needle/tip chart.
- Change the needle — it might be worn or damaged.
- Insert a new fluid tip — this can deteriorate with age or mishandling.
- Check the fluid tip is fitted properly — if it isn’t seated correctly and tightened, paint can accumulate inside the air cap.Clean the fluid tip — dirt, dried paint, or debris cause blockages in the tip.
3. Air Cap Leaking Without Triggering Gun
- Contamination is preventing the air valve from sealing — take out the air valve and clean the shaft seating and the valve itself.
4. Slow Leak From Fluid Tip and Needle Seat
- Replace the spray tip — worn, scored on damaged seals give way to fluid seepage.
- Renew the needle — the outside of your needle might be worn or damaged.
- Clean the needle and tip mating surfaces — contamination will prevent these components from making a good seal.
- Is your needle and fluid tip compatible? — ensure these two parts aren’t mismatched.
- Clean and lubricate the needle — this ensures the needle can move freely and doesn’t stick.
- Loosen the needle packing — if it’s too tight, the needle won’t engage.
5. Fluid Leaks Considerably or Jets From Fluid Tip
- Remove the needle and tip and clean these and the seat — contamination from dried paint or dirt prevents these components from gaining a good seal.
- Ensure your spray tip and needle match in size — if these two aren’t the same size, they won’t work together in your spray gun — allowing fluid to escape.
- Clean all needle components and the needle shaft — the needle will bind and stick if it’s not free from contamination and properly lubricated. Also, check that the packing isn’t too tight, preventing movement.
6. Build-Up On the Air Cap or Fluid Tip
- Ill-fitting fluid tip — ascertain that the tip is fitted correctly and make sure it’s tight enough.
- Loose or worn packing on the needle or fluid tip — check for a blockage or any damage, and either clean or replace, depending on what you find.
- Air cap holes damaged — fit a new air cap.
- Bounce back of fluid causes build-up on the gun head — clean your spray gun head well after every use.
7. Needle Exit Point in the Upper Handle has an Air Leak
8. Jammed Air Cap
If this doesn’t work, or the ring looks damaged or out of shape when you inspect it, you might need to cut it off and replace it. You could also damage the baffle in this process, so you may need to change that as well.
9. Sluggish Trigger Action
- Air valve stem is bent — change this part for a new one.
- Contaminated air valve stem — remove and clean this part, then replace it.
- Dirty fluid needle shaft — take out the needle before cleaning and lubricating the needle shaft.
- Soiled trigger bearing screw — remove this screw carefully and clean it.
- Needle packing or packing nut is too tight — loosen the packing nut, packing or both.
10. Problems with the Fan Control
- Change out the internal o-rings situated at the top rear of your spray gun — these may have been damaged or become swollen.
- Clean the control knob and threads — remove this component and get rid of debris or dried paint, which prevents smooth operation. These offenders can interfere with the trigger’s effortless operation.
- Remove fluid tip and baffle and check they are correctly fitted — you won’t be able to switch between oval and round fan patterns if these components aren’t securely in place or damaged in any way.
- Replace air baffle chimney — check for signs of wear or damage and renew it if necessary.
11. Air Control Valve is Sluggish or Won’t Turn
12. Air Valve Issues
- The trigger is sluggish when pulled or released — the air stem valve could be kinked. Inspect it and renew it if this is the case — but if you find it’s simply suffering from accumulated debris, clean it.
- Air valve stem leaks air — check it out for any damage to the seal, and replace.
- The air valve doesn’t function when you pull the gun trigger — this could be a bent air stem or system contamination — either can stop this valve sliding freely into the gun body. Replace or clean as necessary.
Carry On Spraying
An airless or HVLP paint sprayer is a fantastic addition to any professional painter or home DIYers tool kit. On the whole, they’re reliable and durable — but there are occasions when you need to maintain and fix them.
In my guide, I’ve covered generic solutions for many of the issues you may encounter. However, some problems you might come up against are beyond the realms of a quick DIY fix and need to be referred to the experts for your particular paint sprayer.
If you can’t find what you’re looking for here, check out my brand-specific paint sprayer troubleshooting guides for some of the major players in this market — Graco, Wagner, Titan and Fuji.


