Easy Project #1 – Re-Cushion the Table Chairs
In today’s ever-fluctuating economy, many people try to stay ahead of their finances. That’s why they usually don’t have the money to go and purchase some new table chairs once the cushions start to look ugly and worn. Fortunately, your trusty staple gun can be of great help in such a situation.
Re-cushioning the table chairs is one of the best staple gun projects – not only is it incredibly easy, but will also make your whole kitchen look better. In case your chairs aren’t just plain wood and already have some padding on them, you can simply remove the fabric and adequately clean the chairs.
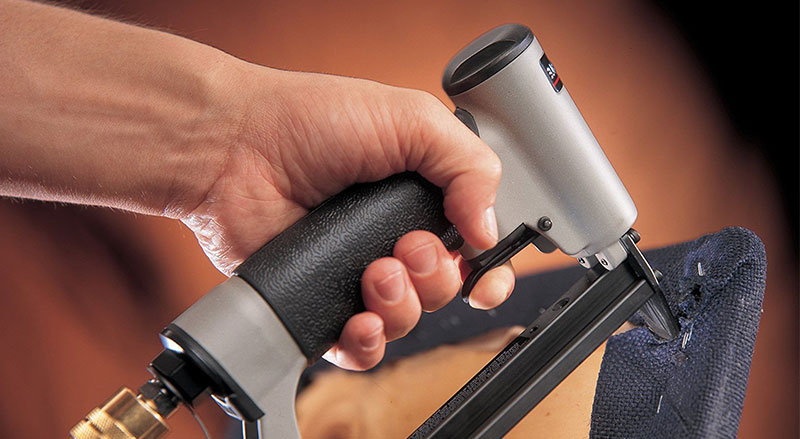
Cut the fabric to the required size while allowing a few extra inches of it on all sides. Keep the material tight and taunt, and then fold it around the chair. Use your staple gun to staple the fabric to the underside of the chair.
That’s it – your chairs now look brand new! A great bonus here is the fact that you can pick the design of the fabric that best matches the look and feel of your home. And once you decide to change the look of your interior, you can do the same with your chairs.
Easy Project #2 – Make a Scratch Spot for your Cat
No matter how much you love your cat, there’s simply no need to spend your money on the expensive cat scratching posts – you can make one yourself. This is a very easy staple gun project and one that will allow you to use the extra carpeting if you have any of it left around the house.
Get some scrap wood 2×4’s (you might even find this on someone’s curb, ready to be thrown away) and cut a square base out of it. You can also cut out a circle if you like – just make sure that it’s large enough not to fall once your furry friend starts scratching on it. After that, center a vertical 2×4 with the help of some wood glue, and let it dry.
Once it’s dry, you can take that extra carpeting, wrap it around the post, and then thoroughly staple it down with your staple gun. That’s it – one man’s trash becomes another man’s treasure! Your cat will now have a comfy place for scratching and sleeping, finally freeing your favorite sofa.
Easy Project #3 – Make a Bench out of an Old Coffee Table
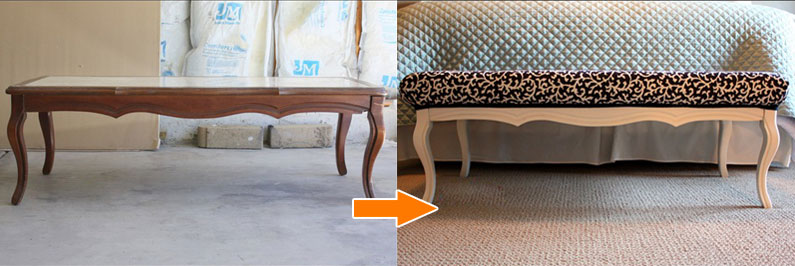
If you have kids or pets, you’re probably aware of the tear and wear that they inflict upon your beloved coffee table. From scratches and water marks to nicks and chips, your coffee table will become old and ugly. You’ll eventually buy a new one, but that doesn’t mean that the old one has to go to waste.
The old coffee table can, actually, be turned into a wonderful custom bench. And the whole process of turning it into a bench is very similar to that of the re-cushioning the chairs – it’s simple and easy.
The first thing you’ll have to do is to clean the table up. You don’t have to worry about sanding the damaged spots – they will be covered with the fabric in the end. After that, you can measure and cut your favorite fabric (or padding) and place it on the coffee table. The next step is an obvious one – staple the material on the underside of the table to hide the staples.
You’re done – a brand new bench is ready to be used in your living room or on the sun porch.

Easy Project #4 – The Table Skirting
Many people like to add style to their lives through fabrics. And one of the best staple gun projects in that regard is to make table skirts for the bedrooms of your children. It’s a fun and easy project, and one for which the themes are almost endless. Take down the children’s night-stand tables and clean the dust, after which you can let the kids choose their favorite colors. After that, you should hold the fabric to places where it will be stapled to the table and then measure the length from the floor to the top of the table. This depends on the how low you would like the skirt to hang and on the height of the table. Finally, you can staple the fabric to the table and add some pleats for the better, textured effect if you’re good with the sewing needles. When done right, this staple gun project can turn out fantastic, easily adding some character to the rooms of your children. Of course, this idea can also be used for baby shower tables, wedding reception tables, and similar things.
Easy Project #5 – Make a Photo Board
For this easy staple gun project, you will need a 16″ x 20″ canvas, a roll of ribbon, a hot glue gun, a hot glue stick, a ruler, scissors, as well as the staple gun. Start the project by laying down the canvas on the fabric of your choice. Trim the fabric around the canvas, but make sure to leave at least two inches on each side. Pull the fabric tight and carefully put 3 or 4 staples on all sides of the canvas. Make sure that the staples get into the wooden part.
Now, take a ribbon of your choice and make an “X” across your square-shaped canvas, and, once again, leave two extra inches of ribbon on all four ends. These extra ends will be stapled on the back of the canvas – make sure to pull them tight before you do the stapling. Do the same thing with two more pieces of ribbon, but place them in a way that they cross the already stapled ribbons, making a net-like pattern. Now that all six ribbons are stapled to the canvas, you can glue them at places where they cross each other.
You can also use accessories of your choice (like small artificial flowers or buttons) to decorate the spots where the ribbons are crossing each other – there should be nine such places. You can also add an extra ribbon on the back of the canvas so that your new photo board can hang on the wall. You can now place your favorite photos between the ribbons and have a nice little gallery of your life’s favorite moments right there on the wall. Quite wonderful, wouldn’t you say?
Easy Project #6 – Make a Dust-Proof Cover for your TV
If you’re an owner of a flat-screen TV that’s hanging on the wall and would like to have it protected from dust while you’re away from home, you could make a beautiful dust-proof cover for it. For this project, you will need 1 x 2 lumber (cut to size), 4 L brackets, canvas, some craft paint and a paintbrush, as well as the staple gun.
Start by measuring your TV while leaving at least half an inch on all sides to make sure that the cover fits your TV. Cut the lumber and build the frame with your L brackets and some bolts. Now, cut the canvas to the same size of the frame but leave a couple of inches on all four sides. Pull the canvas over the frame and staple it on the backside.
All that’s left is to take the paintbrush and paint whatever your heart desires (you could use printed fabric if you’re not that much into painting). Your beautiful new canvas cover will protect the TV from dust and look like a piece of art right there on the wall.
Final Thoughts
As you can see, a staple gun can be used for many different things – there’s an abundance of simple projects that will help you brighten the environment and also give the worn household items a new life that they deserve.
The possibilities and ideas are truly endless, and one can have a great time by doing it either alone or together with the kids. We hope that this article opens your eyes and makes you think of some other money-saving DIY ideas.


