
Luckily though, the process isn’t all that complicated. And so long as you’re equipped with the right tools for the paint stripping task, you and your firearm will emerge unscathed.
We get asked a lot about how to strip paint from a firearm and how to remove the white lettering. So much so that we decided to put our painting experts to work and prepare this comprehensive guide to firearm paint removal.
Here, we’ll cover two different methods of removing paint from a gun, plus we’ll detail how to remove white firearm lettering.
Before we get stuck in though, let’s examine why people have such an issue with what should be a minor task!
Why is stripping paint from a gun difficult?
Combine these factors with the fact that many firearms are constructed from multiple materials, and you’ll start to get a sense of why stripping paint from a gun is harder than stripping paint from other surfaces.
Additionally, firearms are dangerous when handled incorrectly. That’s why it’s super important that you follow some strict safety procedures and use solvents that are safe for use with firearms.
Now that we’ve covered some of the need-to-knows, let’s get stuck into our first method of firearm paint removal.
How To Strip Paint Off a Gun: Citristrip Method
Before you get started, make sure you have all the stuff you need for the task at hand.
Things You Will Need:
- Plastic putty knife
- Canvas drop cloth
- Rubber gloves
- Rags
- Citristrip Gel
- Paintbrush
- Plastic drop cloth
Step 1: Unload Your Weapon
Before you start stripping paint from your gun, you have to make sure the firearm is unloaded.
Firearms need to be respected. While inherently inert, a gun can cause serious harm to anybody in the vicinity if accidentally fired. Treat every weapon like it’s loaded and always keep your finger off the trigger.
Before you remove your gun from its safe for unloading, ensure you have an area to work in without others around. Then unload your weapon.
While separately housed power units have benefits, including faster delivery, better durability, and are more suited to thicker mediums, one issue is they can be the size of a small car (well, almost).
As they’re relatively small, the best handheld paint sprayers can be stored in the boot of your car, under the sink, or in a kitchen cupboard, making them the ideal unit for casual or intermittent DIYers. Furthermore, being bijou, you can easily transport them from site to site — try moving a pneumatic compressor just to help your Auntie Mable redecorate her living room.
Step 2: Scrape Away the Old Paint
Place your gun on a canvas drop cloth. Next, you’re going to use a flexible plastic putty knife to scrape and remove as much of the color as possible. Choose a putty knife that’s appropriately sized for this task. As guns have components of varied sizes, a set of knives like this one is helpful.
As you scrape, be extra careful with your knife to avoid damage to the gun’s surface.
When you’ve finished this step, you might notice a few minor scratches, but try not to worry about these as you’ll be repainting your gun soon. Remember that any type of gun paint removal is difficult and minor scratches are par for the course.
Step 3: Protect Yourself
When working with cleaning chemicals, protecting yourself is important. Put on your rubber gloves to prevent any potential chemical burns.
Additionally, if you’re sensitive to the smell of storing chemicals, we recommend a face mask.
Step 4: Apply Lacquer Thinner
Next, you’ll apply Citristrip Gel to the firearm’s barrel. Move your gun from the canvas cloth to a plastic drop cloth. If possible, place both the gun and cloth inside a large tub or sink and work in there.
Apply a generous coating of Citristip using your paintbrush. Ensure that all painted areas are liberally covered. Once complete, set your gun aside somewhere safe and leave the Citristrip to do its work for an hour.
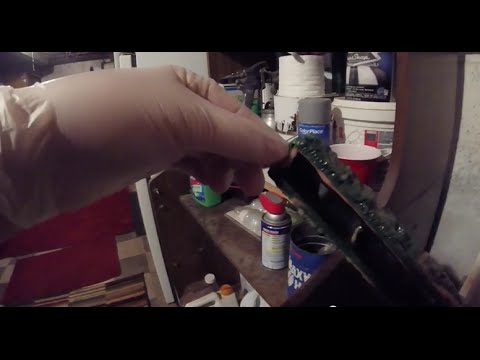
Step 5: Peel and Scrape Away the Paint
After an hour, it’s time to remove the paint from your firearm. Use a flexible putty knife to very gently scrape away the paint. Depending on the paint used, you may find that it’s already bubbling off courtesy of the Citristrip, if so, you can simply peel it off.
When all the paint is removed, use warm water, a little detergent, and your rag to gently remove any last flecks of paint and the cleaning chemical.
How To Remove Paint from Your Gun: Soaking Method
Things You Will Need:
- DOT 3 Brake Fluid
- Plastic container
- Toothbrush
- Hard brush
- Rubber Gloves
- Rags
- G96 oil
Step 1: Soak Parts
Before you begin, follow steps one and three from above, that is, unload your gun and don your personal protective equipment.
Next, place the parts of the gun you want to remove paint from into a large, suitable container. Then pour just enough DOT 3 to cover these parts. Use your toothbrush to brush the fluid into any hard-to-reach places.
Leave the parts to soak for about an hour. Turn the parts a few times to ensure each section is fully treated. Use your gloves because this chemical is very toxic.
Step 2: Remove Stubborn Paint
After the soaking time is complete, you should notice that the paint is starting to peel off. All you need to do now is use a hard brush to scrub away the paint.
You’ll need to be persistent because the color will try to hold to the plastic. Just keep at it but have faith in the process and your own elbow grease!
Step 3: Use G96 Oil
Once all the paint is gone, use your rag to apply some G96 oil to the gun’s parts for protection and lubrication.
And that’s it, your firearm will look as good as when it first left the factory! Well, after you repaint it, of course.
If you’re not sure which paint for firearms is right for your individual model, you can learn more here.
How To Remove Firearm Lettering: Gun Pen Method
Plenty of otherwise sleek black guns have a lot of unattractive white lettering on the side. Luckily, removing (or rather hiding) white firearm lettering is easy.
In most cases, the trademark lettering can be wiped away with solvents and there’s no residual damage to the gun’s surface.
A word of warning though: Different cleaning chemicals can react in various ways to different paints. And there’s no real way of knowing in advance how compatible the solvent you’re using is with the gun’s paint.
S, if you decide to remove the white lettering from your gun via chemical means, there’s a risk that you’ll mess up the original paint job.
But, it doesn’t have to be this way, we have a simple solution for you.
Removing White Lettering With a Gun Pen
Get your hands on the Birchwood Casey Presto Mag Gun Blue solution. This product is specifically designed for firearms and re-blues your weapons. The kit we’ve linked to above comes with a gun bluing pen in Super Black.
It’s that gun bluing pen we’re going to use today. Don’t worry though, you’ll put the gun blue to good use maintaining your weapon in the future.
Start working the ink into the white lettering on your gun using the bluing pen. The thing you need to remember is that it won’t finish the job in one covering. You’ll have to spend some time and build up the layers, slowly working the ink into the white lettering.
You can see the process in action here:
After you’ve finished the job, leave the gun to sit for another 30 minutes before handling it. This gives the bluing ink time to sink in and bond properly.
One great thing about this pen is that it can fix other areas on the firearm too. For example, in places where paint has started to peel, just use your pen.
Final Thoughts
That concludes our guide to stripping paint off a firearm, both with Citristrip and the soak method. You’ve also learned how to get rid of white lettering on the side of a gun.
Like with many things, stripping paint from a gun is not difficult provided you have the right tools and products.
If you found our guides to removing paint from firearms helpful, don’t forget to share this article with your friends!


