
How to drill in metal? A question often asked in DIYer forums and the like. It conjures up images of hot metal sparks flying about, which unsurprisingly can at times make even the most avid DIYer wary of the task.
Fear not, drilling into metal is similar to drilling into most other surfaces. In fact, some would say simpler. It’s not as scary as it sounds — with the right technique, anyone can master it.
This is why I’ve put this guide together, as I feel it’s important to show you just how easy drilling into metal can be. There’s nothing to be scared of, so let’s crack on!
What Is the Best Drill for Metal?
You would assume with metal being a robust material, it requires the use of a specialized high-power drill. However, that’s not the case. The reality is you can use almost any drill you have in your arsenal of tools, corded or cordless. For example, the Makita XFD10Z features variable speed, which helps accomplish more accurate boring for a precise hole. For even more accuracy and generally better results when drilling into metal, especially pipework or sheet metal, a drill press can make the job much easier. If you’re interested in finding out more, take a look at my guide on How To Use a Drill Press.

What Is the Best Drill Bit for Metal?
Choose a twist bit style — with flatter cutting edges at the tip rather than a center spike. The latter type wears out much quicker, or the spike can damage as you drill through metal. If you need to drill holes of varying sizes, a step bit with a cone-shaped design is ideal for drilling into steel or sheet metals. And, for even larger diameter holes, a hole saw is great for softer or thin metals like aluminum.
What Is the Best Material for Metal Drill Bits?
Drill bits for metal are made from one of the following four types of materials:
- High-speed steel (HSS).
- Black oxide.
- Cobalt steel.
- Titanium.

Safety Considerations When You Drill Through Metal
Okay, I know this is the boring bit, and you’ve probably heard it all before. However, no guide on how to drill through metal would be complete without mentioning safety tips. We’ve all seen those shots of glowing bits of metal flying in the air when welding or drilling metal. Nice firework display but not so nice if one lands on your skin or even worse, in your eye. Hence, wraparound goggles are a must-have when drilling into metal. A mask and some sturdy gloves (not cloth) are also advisable. And, cover up, when drilling into stainless steel or other metals, consider wearing long-sleeves with a collar. If you’re drilling through a piece of loose metal, where possible clamp it. If the drill should grab your workpiece, the drill’s twisting action will transfer to the metal and cause it to spin or come loose. Remember, drilling leads to metal heating up fast. Hence, a lower drill speed and a metal lubricant or oil can help prevent the bit and the metal from becoming too hot. And finally, ensure you allow plenty of time for your material to cool down before inspecting your handiwork or touching it.
What You Will Need to Follow this Tutorial
Before we start let’s ensure you have all the equipment ready for drilling that perfect hole into metal.
- Drill.
- Drill bits — varying in size suitable for your chosen metal.
- Clamps (x 2).
- Nail punch.
- General-purpose lubricating oil.
- Safety gear — including those all-important wrap-around
- safety goggles.
- Dust mask.
- Fire extinguisher.
- Two pieces of wood (optional).
- Measuring tape.
- Pencil.
How To Drill a Hole Through Metal Step-by-Step Instructions
Before you start, remember to don all your safety gear and don’t remove it until you clear up the work area. Those small curly shards of metal can be extremely sharp — one minute sliver in your eye can be enough for a visit to the Emergency room.
Preparing the Metal for Drilling
- Mark up where your hole needs to be. Using a measuring tape and pencil make a cross where you intend to drill.
- A small center or nail punch comes in handy here. Tap with a hammer to make an indent. This offers the point of your drill a place to sit, preventing it from wandering as you start to drill.
- Clamp the metal if possible to a solid surface like a workbench to avoid it moving or spinning as you drill. Use a minimum of two clamps while still allowing easy access to the hole
- When drilling thin sheets of metal, create a wooden sandwich using two pieces of wood. It helps secure the drill bit as it penetrates. Simply sandwich the sheet of metal between two offcuts of wood, and secure in the clamps.
- Lubricate. When drilling holes in steel that’s over 0.125 inches thick, use a general multipurpose oil to lubricate your bit and the metal. This will reduce friction and avoid overheating. Hot drill bits tend to dull much quicker.

Pre-Drilling — The Pilot Hole
Time to drill. Here we go!
- If you need a larger hole, start with a smaller bit — up to 0.25 inches in diameter — to make a small pilot hole and work up to your eventual required hole size.
- Fix the bit securely into your drill chuck. Now make sure it’s fully tightened before placing the bit over the indent you made with the punch when preparing the metal. It’s best to slowly drop the drill into the indent rather than forcing it — this will prevent the drill grabbing the metal.
- Hold the drill as directly upright in a vertical position as possible before slowly starting to squeeze that trigger.
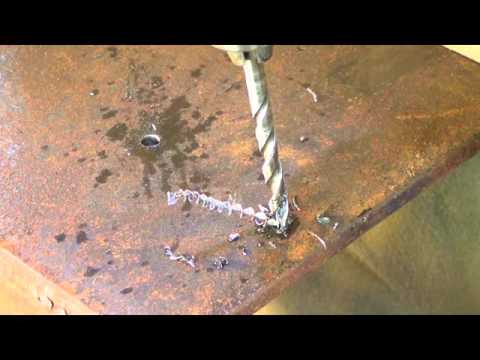
- Slow-speed drilling is the key. The aim is to avoid causing too much friction or heat as you drill. So, go much slower than you would with other materials such as plastic or wood. Harder metals like steel, especially with a larger drill bit will require much slower speeds. For those very large twistie drill bits, I’d suggest dropping the speed down to as low as 350 rpm to 1000 rpm. With a smaller bit, you can kick up the pace — up to 3000 rpm.
- If you see smoke, stop immediately. It means your drilling pace is too fast and you’ve created too much heat. Take five and let the bit cool. Top up the lubrication and resume — at a slower rpm.
Drill Through Metal
- Once your drill bit has completely penetrated through, stop and allow it to cool down before removing the bit.
- Take your desired-size bit for your soon-to-be hole and secure it in place. Another option — use a hole saw bit. This can take that initial indent or pilot hole and make it significantly larger.
- Lubricate the hole and the bit again to prevent any further heat build-up.
- Continue to drill slowly — as detailed in the pre-drilling steps above — with a gradually increasing drill bit size until your hole reaches the required diameter.
- Allow the metal to cool down before handling.
Post-Drilling
- Drilling a hole in metal will normally leave sharper edges than wood. Known as ‘burrs,’ these small sharp pieces or points of metal remain around the edge of the hole and will need removing.
- Deburring tools are available, but a handy cheat is simply to use a drill bit that’s slightly larger than the hole you created.
- Holding the drill bit in your hands, remember to keep those tough gloves on, place it into the top of your new hole and gently twist. This allows the fluted design of the bit to remove any unwanted sharp edges.
- Once successfully deburred, clean off any excess oils, and hey presto, you’re done. Stand back and examine your handiwork. Great job!
Conclusion
Together, we’ve just seen how easy it can be to drill into brick, providing you choose the correct drill and bit for the job.
Following this step-by-step guide and taking it very slowly will have you boring holes into brick walls like a professional in no time at all. Whether you’re installing a shelving unit, some new fancy art deco lighting, or your latest technological pride and joy, you can rest safe it will stay put.
I hope you’ve enjoyed this tutorial and now understand more clearly how to drill in brick. And, if you’ve found this article helpful, please feel free to share it with your other DIY drill-loving buddies.


