
There are numerous methods to accomplish this goal — every one suited to particular applications and circumstances. Knowing when to use each procedure will save you time and lead to more rewarding results.
So, here’s your ultimate guide to stripping paint from wood.
Why You Should Strip Paint From Wood
The motivations behind removing paint from wood can be through choice or necessity. Here are the main reasons why you’ll want to strip that existing coat layer.
Preparing for Repainting
Theoretically, you don’t always have to remove paint before applying a new coat.
For water-based substances, you can paint directly on top of the existing layer — although, I would suggest thoroughly cleaning first before you begin.
However, for paints with an oil base — such as gloss — you can’t just get straight on with your new color choice. Oil on oil has a tendency to crack and break. It may look wonderful for the first couple of weeks — but the first time little Tommy runs his favorite Hot Wheels along your windowsill — that paint will flake.
Admittedly, you can gently sand the gloss to create a keyed surface, apply undercoat, and then re-cover — but that’s a heck of a lot of effort when you could just strip it.
Additionally, years-old oil-based and water-based paints will break up and peel over time. This gives you an uneven base material to work with — one that will be emphasized by your new coat. Stripping the old material off provides you with a smooth surface on which to apply the fresh paint.
Restoring Detail
Let me tell you something.
I hate photo-app beauty filters. Admittedly, these progenies of the Devil smooth out your girlfriend’s face — but they also take away all her individuality and make her appearance the same as thousands of other selfie addicts.
Ok, depending on how your girlfriend looks, in some circumstances this may be a welcome bonus. But, generally speaking, I think it’s something to be avoided.
Paint can be like a smartphone filter on your furniture and home woodwork.
Coat upon coat hides their features — making intricate turning work, moldings, and textured relief disappear. They turn once character-filled wood into a nondescript smooth surface.
Removing paint can restore their original beauty — revealing the hidden detail.
Addressing Accidents
I can guarantee — whatever you paint — some of that sticky and colorful liquid will end up somewhere it’s not supposed to be.
Painting your door frame will undoubtedly leave specks and spots on your door, walls, and floors. If you address the mishap immediately, then there’s usually no issue. But, should it go unnoticed — or you’re just too lazy to sort it out at the time — those paint flecks can become a permanent addition to your home.
Additionally, children, bless them, love painting. And — unless you line your room with plastic sheeting akin to a scene from CSI — your home will be beautifully rainbow colored.
Luckily, understanding paint stripping methods will enable you to restore your house to pristine condition.

Revealing Natural Wood
Fashion is weird, right?
Personally, I don’t really get it. If my clothing is comfortable and fits — then I’m happy. Give me my work trousers, safety boots, and a tool belt, and I’m happy.
Sadly (or perhaps luckily), not everyone is the same as me. Just like apparel, home decor and furniture fashions change — perhaps none more so than wood.
This is a shame, as wood is beautiful. There’s nothing better than a door or table that shows off the natural grain of this material.
Well, apparently you can, as people have criminally abused wood over the years. Such methods include glossing, whitewash-aging, ragging, and decoupaging (the last two are girly things — ask your wife).
Thankfully, you can undo most of these disasters by removing the paint — revealing the true character of the timber beneath.
What Type of Wood Can You Strip?
Any kind of wood — well, as long as it is actually wood.
That bargain coffee table you picked up at your neighbor’s garage sale may look like solid wood — but the reason you only paid $5 for it could be because it’s actually textured MDF.
Typical wood paint-stripping applications around the home — although not an exhaustive list — include:
Parquet flooring.
Built-in wardrobes.
Indoor and outdoor furniture.
Banisters.
Newel posts.
Stair rails.
Doors.
Door frames.
Antique/vintage furniture.
Windowsills.
Baseboards.
Window frames.
Children’s toys.
Floorboards.

Removing Paint from Wood Safety
Whichever of the below methods of paint removal you follow — there are some safety safeguards you should always adhere to.
At the very least — wear eye protectors and a respiratory mask.
Removing paint from wood will create dust, which you neither want to get into your eyes nor inhale. Furthermore, work gloves are highly advisable — ideally when using a heat gun, and crucially if you’re using chemical remover.
There’s just one more vital safety precaution — to test for lead in the paint.
This metal is nasty stuff which, if inhaled, can cause unpleasant health issues, such as memory loss, muscle pain, high blood pressure, and nervous disorders.
The problem is, prior to 1978, paint manufacturers threw this material around in the same way as Marie Curie was carefree with polonium (she would carry some in her pocket as it made a ‘pretty light’ in the dark). These companies included lead because it accelerated drying, resisted water, and increased durability. When undisturbed, it’s perfectly safe — but heat, chip, or sand it — and it could be a health bomb.
Hence, if you have any suspicions that your paintwork is from before 1978 (when it was banned) — you can buy a home test, or send a sample to a laboratory. The United States Environmental Protection Agency (EPA) has a comprehensive list of certified testing facilities.
The Top Four Methods of Removing Paint From Wood
Enough of the talk — as Mr. T would say, time to quit the jibber-jabber (or if you’re younger than 40 years, Shut Up as the Black-Eyed Peas sang).
Let’s get down to business.
Here are the top four ways to strip paint from wood:

1. Heat Gun
A heat gun, sometimes referred to as a hot air gun, is considered by many people to be the pinnacle process of paint removal — being the go-to method of professionals and ardent DIYers worldwide.
It’s attraction is its flexibility.
Many machines, such as the Wagner HT3500 come with a choice of nozzles — altering the heat distribution and therefore making them suitable for both large and small projects. Furthermore, digital examples enable you to make precise temperature selections — sufficient to easily remove the paint, but not so high that it will burn wood.
In short, whether you’re stripping an entire staircase, or just taking off a few accidental paint drips from your wooden floor — a heat gun is ideal.
How a Heat Gun Works
A hot air gun, looking somewhat akin to a DIY-styled hairdryer, contains a heating coil. As this component warms up, an internal fan blows over this coil, distributing air out of the front of the machine.
Wielding it as you would a pistol, you direct this plume of heat (over 500 degrees Fahrenheit) onto your paint. This causes the colored coat to warm up, become pliable, and then blister. You can then easily remove it with a standard DIY scraper tool.
Just a quick word of advice — don’t confuse a heat gun with a blowtorch.
Heat guns deliver fire-free heat, whereas a blowtorch is a mini flamethrower in your hands. These units are ideal for melting tar, welding, brazing, and soldering — but not particularly suited to accurate stripping of paint — hence why they’re not included in my top removal list.
Sure, they’ll remove numerous coat layers. But then, so will covering your antique table in gasoline and setting it alight (don’t do that, this isn’t one of my suggested methods either). The flame of the blowtorch can easily cause burns or scorches, and make your paint and base material catch fire.
How to Strip Paint With a Heat Gun
What you need:
Safety equipment.
A heat gun.
Scraper.
Steel wool or sandpaper.
Isopropyl alcohol.
Clean rag.
For a comprehensive explanation of hot air removal, check out my Heat Gun Paint Stripping 101. However, if you just want a seriously brief overview, here’s the method.
- Warm your heat gun up to 500 degrees Fahrenheit. Some don’t have an exact temperature feature, so you need a unit suitable for paint stripping.
- Grasp the hot air gun in your non-dominant hand and a paint scraper in the other.
- Heat up the paint from a distance of around three inches — continually moving the machine up and down over an area of five inches at a time.
- As the paint begins to blister, take it off in the direction of the wood grain with the scraper.
- Once you’ve finished one section, move onto the next.
- Should there be any stubborn spots, rub these gently with steel wool or fine-grit sandpaper to remove.
- Wipe the woodwork down with isopropyl alcohol and a clean rag.
Advantages of Removing Paint With a Hot Air Gun
Affordable — not disposable like sandpaper and chemicals.
Works on both large and small projects.
Easy to use.
Variable temperatures prevent damage to the wood base.
Creates less mess and dust than planing or sanding.
Removes paint rapidly.
Suitable for all paint types.
A heat gun has a multitude of other uses.
Disadvantages of Removing Paint With a Hot Air Gun
Care needs to be taken to prevent scorching the wood.
Needs a power source — you may need an extension cable on expansive projects, such as removing paint from banisters.
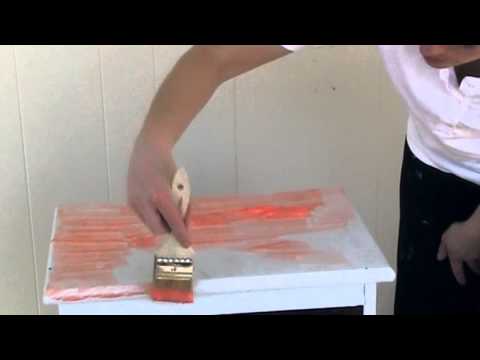
2. Sanding

While effective, the issues are that it’s seriously time, effort, and disposable material intensive. You need to use a variety of sandpapers and considerable arm and hand stamina — especially when tackling expansive areas.
Hence, sanding is most suited to small furniture projects, paint stripping a wooden knob or handle, or accessing crevices and cracks that a heat gun will not touch.
You can take away some of the physical effort by using an electric sander. However, if you do this, be careful. Too much pressure and you’ll scratch and taint the wood beneath.
That being said, there is one application in which electric sanders seriously excel — floors.
Unless you have a timber-paneled house, your flooring will likely be the largest expanse of wood in your home. Even the mighty heat gun would struggle with such a wide area (unless you have an inordinate amount of free time and a whole heap of patience).
Hence, if someone has painted your boards, and you want to return them to their natural look, an electric sander is ideal. You can either use a large, hand-held model, or go for the more expensive upright designs. As flooring experiences a wide range of knocks, bumps, and scrapes through its lifetime (you walk on it daily), scratches and nicks from the sander are less important than on, say, your dining table.
How Sanding Works
Sandpaper, or glasspaper, consists of a backing material, covered with a strong adhesive, to which are glued particles of abrasive material, such as aluminum oxide, silicon carbide, and chromium oxide (they don’t contain sand or glass anymore).
Rubbing this gritty surface on paint has two effects. It heats the coating up through friction, making it more pliable and easier to remove, and effectively ‘cuts’ into the paintwork, lifting it up from the wood.
An electric sander allows you to attach sandpaper to the base of the machine — usually on a foam-covered panel. When the unit is switched on, it oscillates back and forth — mimicking the action of hand sanding. Furthermore, modern units often incorporate a bag or vacuum attachment nozzle — helping to reduce airborne dust during use.
How to Strip Paint By Sanding
What You Need:
Safety equipment.
An electric sander.
Coarse, medium, and fine-grit sandpaper.
Warm water.
Detergent.
Sponge.
The following method applies to stripping with a power sander. However, if you don’t have an electric machine, I recommend using a sanding block, which increases coverage and reduces finger fatigue.
- Cut a rectangle/triangle of coarse grip sandpaper (dependent on the machine) and attach it to your sander — some brands retail pre-cut sizes for particular models. It’s crucial you initially use a coarse grade — too fine, and it will clog rapidly.
- Switch on the power sander.
- Press the sander onto the paintwork — you need firm, but not excessive, pressure.
With both hands on the machine, make slow and deliberate back and forth movements in the direction of the grain — working to cover the entire material. - Once you have taken off the top layer(s), and can see the wood peeking through from below, switch to a medium grit paper.
- Continue sanding (still following the grain) until just a few spots of paint remain.
- Fit your fine-grit paper to remove these stubborn dots — and to take off any scratches you’ve caused through earlier, over-enthusiastic sanding.
- Wipe down with warm water, detergent, and a sponge, to remove any residual paint flakes and dust.
Advantages of Removing Paint By Sanding
It gives you a greater feeling of control as you can ‘feel’ the wood.
Hand sanding is ideal for cracks and crevices — allowing the narrow paper to penetrate.
If you hand sand, you don’t need access to a power supply.
Requires no chemicals.
No chance of burns, unlike using a heat gun.
Ideal for wood flooring — if you have an upright drum sander.
Disadvantages of Removing Paint By Sanding
Creates a lot of dust if you don’t have a collector or vacuum nozzle.
Sanding by hand is seriously hard work.
Requires purchasing numerous papers for each project.
3. Planing

Ok, maybe not that extreme — but I’d only recommend this method if all other avenues have still failed to take off the paint.
Does it work? Undoubtedly. The problem is, however fine a setting you position the planer (or plane) blade, you’re going to remove some of the woodwork beneath as well as the paint coat. This may not be an issue if you’re tackling cheap baseboards, but you’re going to cause antique lovers a heart attack if you swipe it across a 300-year-old Chippendale dresser.
Additionally, a planer is only suitable for flat woodwork — it will struggle with anything that’s curved or molded. And, unless you purchase an electric planer, it takes a great deal of physical effort.
How a Plane Works
A hand plane comprises a robust upper body with an adjustable blade beneath. Power planers are slightly different — they usually consist of rotating cutters on the base of the unit.
However, their method in paint removal is the same — riding over the wood and cutting into raised areas, while also delivering a constant angle to the blade edge(s). But, as the paint forms only a relatively thin film on the timber, taking the paint off satisfactorily means that there is some inherent wood loss too.
How to Strip Paint With By Planing
What You Need
Safety equipment.
A hand or power planer.
Tack lifter and screwdriver.
Supports to keep the wood horizontal.
Fine-grit sandpaper.
Warm water.
Detergent.
Sponge.
If heat guns, chemical strippers, and sandpaper have all failed to remove your paint — here is the power planing method.
- Ideally, have the surface you’re about to plane in a horizontal position. This may — for example, in the case of doors — require removal. If you have a sufficiently large workbench, then position it on top. Alternatively, you can use a Workmate, sawbuck, or the floor.
- Lightly run your fingers over the entire painted surface — checking for any tacks, nails, and screws that could possibly damage your blade. If you discover any extraneous hardware — remove it.
- Position the blade(s) on the smallest angle setting — to lower the amount of wood you’re going to shave off.
- Switch on the power planer and grasp it with both hands.
- Push the plane forwards (away from your body), achieving sufficient pressure to allow paint and wood slivers to emerge from the rear of the tool. If possible, do this in one continuous movement for the length of the material — for a more even finish.
- When you’ve removed the majority of the paint, remove any residual specks or blade nicks with a fine-grit sandpaper.
- Finish by washing down the wood with detergent and warm water, to remove the dust.
Advantages of Removing Paint By Planing
Tackles the most stubborn paint.
Rapidly reveals fresh wood beneath.
A power sander is relatively effort free.
Disadvantages of Removing Paint By Planing
You lose wood as well as paint.
Not suitable for intricate work and moldings.
Unless you apply constant pressure across the whole area, you may end up with bumps and dips.
4. Chemical Paint Remover

However, they can be hard on your wallet.
This isn’t a technique for large paint stripping projects — one standard 500 ml can of chemical remover will only just cover a door. And, if there are multiple paint layers, your job may require a few applications of stripper — meaning several cans.
Hence, the ideal use for liquid removers is in combination with another method. Tackle the large expanses of paintwork with hot air or sanding — and then eliminate the hard-to-access areas with the chemicals.
How Chemical Paint Remover Works
There are two forms of liquid stripper — caustic and solvent.
Caustic removers usually contain sodium hydroxide — sometimes referred to as caustic soda or lye. They break down the chemical polymers in the paint — reducing adhesion and allowing you to scrape the coats off the wood. However, they need to be handled with care, as they can cause burns to skin.
Solvent strippers penetrate deep into paint layers — aiming to break the bond between the paint and the wood. Most typically, they contain dichloromethane (methylene chloride). While they will not harm your precious skin, they are heavy on fumes — so you’ll need a generously ventilated area to prevent you from passing out.
How to Strip Paint With Chemical Removers
What You Need:
Safety equipment.
Paint stripper.
A metal container.
An old brush — afterward it will be unusable.
Scraper.
Detergent.
Warm water.
Sponge.
Not only do different paint strippers come in both caustic and solvent forms — their method of use and post-application neutralization can vary between brands. Hence, my instructions below are purely a guide — always follow the manufacturer’s recommendations for use.
- If possible, place your paint-covered wood in a horizontal position — this will reduce the risks of the stripper dripping off your material.
- Should the paint remover can nozzle be insufficiently wide to fit a paintbrush — tip an adequate amount of stripper into a metal container that allows you to dip in the brush.
- Generously load the brush with remover and then cover the paintwork with this stripper — ensuring that you penetrate into all the recesses and crevices.
- Leave it to get to work! The manufacturer will indicate the time frame.
- The paint should have softened and started to break up. Remove it with a metal scraper — be careful not to gouge into the wood.
- Should stubborn areas of paint remain, reapply the stripper and repeat the above process. Small flecks and specks can be removed with a little wire wool or sandpaper.
- Wash down the wood with water to neutralize the stripper (or as guided by the manufacturer).
Advantages of Removing Paint With Chemical Stripper
Requires little work — brush on, leave a while and then remove with a scraper.
Ideal for small projects.
Excellent on intricate moldings, wood joints, and crevices.
Disadvantages of Removing Paint With Chemical Stripper
Can damage skin and lungs — precautions are required.
Expensive — not suitable for large projects.

Conclusion
That’s it! I hope you gained some valuable knowledge during this tutorial — and if you feel others may benefit too, feel free to share away!
Listen up.
Every DIYer, hobbyist, or homeowner will, at some time, need to strip paint.
Whether it’s to solve accidental spillages, prepare an excellent foundation for a new coat, or to reveal the natural beauty of wood — it’s an indispensable skill.
For those who need tactile feedback, sanding is perhaps the best option. In intricate and hard to reach areas, chemical removers may be the best solution. And, for the most stubborn of paint — planing may be the only resort.
However, undoubtedly, the most flexible, straightforward, safe, and cost-effective option is to use a heat gun. These impressive machines can make simple work of even the most aged of paint — without damaging the woodwork beneath.
So, now you know how to remove paint from wood — get hold of a suitable heat gun — and get stripping!
Using Heat Gun to Remove Paint FAQs
Q: Does Vinegar Remove Paint From Wood?
No. Vinegar can be a tasty food dressing and a multi-use household liquid. But, it will not remove paint from wood.
That said, you can use it to remove stains from paint — or to clean woodwork after it has been stripped.
Q: How to Remove Paint From Wood Without Chemicals?
Paint stripping chemicals can cause skin burns and respiratory issues. A safer method of paint removal is to sand, plane, or — most effectively — use a heat gun.
Q: Will Nail Polish Remover Remove Paint From Wood?
Yes. Solvent-based nail removers — such as those which contain acetone — are suitable for eliminating tiny specks of unwanted paint. However, they will not address large areas or multiple coats.
Q: How to Remove Paint From Wood Trim?
Address the majority of the wood trim with a heat gun set to 500 degrees Fahrenheit and a metal scraper. Should the material include molding or intricate detail — you can remove paint from these hard-to-reach areas with a chemical stripper.
Q: Is Stripping Paint From Wood Dangerous?
As long as you wear adequate protective clothing, paint removal from wood isn’t hazardous. Always don eye protectors and a respiratory mask at the very least. Additionally, when handling a heat gun and chemical remover, I would recommend always wearing gloves.


