Don’t allow broken festive decorations to put a downer on your celebrations — learn how to fix your Christmas lights using a multimeter!
How often do you have to deal with broken fairy lights? You plug in the whole string of Christmas lights only to discover that they’re not working at all, which immediately kills the festive mood and the spirit of Christmas.
And, as you already know, this beautiful holiday feels incomplete when there are no pretty fairy lights to illuminate the Christmas tree, the roof, the backyard, or the garden.
It’s one of the most common problems, and it can, fortunately, be solved with a little bit of DIY fixing. In this article, we’ll provide you with a short but comprehensive guide on how to test Christmas lights with a multimeter and fix the issues.

What Happened to my Christmas Lights?
Before we get down to how to test Xmas lights with multimeter — to set things off, let’s first look at the most common reasons that can keep the festive lights from glowing at their full glory.
Here are a few possible causes:
- Damaged sockets or bulbs.
- Tripped fuses.
- Torn or damaged wires.
- Non-functional or damaged power plugs.
- Broken switches.
- You haven’t switched them on.
Steps for Testing Christmas Lights and How To Fix Your Christmas Lights
Fixing a string of beautiful Christmas lights isn’t as challenging as some people might think, although the level of difficulty depends on the issue. For successful troubleshooting, you should possess the necessary equipment to determine the exact nature of the problem.
In the following paragraphs, we’ll assist you with the successful identification of the problem’s cause, testing the Christmas lights with a voltage detector, clamp meter, or multimeter — and help you fix it in the shortest possible amount of time.
Before we begin with the troubleshooting and getting down to testing Christmas lights with voltage detector and multimeter, we need to prepare our tools:
Equipment Needed for Testing LED and Bulb Christmas Lights With Multimeter
- Multimeter.
- Voltage tester or clamp multimeter (optional).
- Wire cutter.
- Electrical tape
- Soldering gun.
- Solder roll.
- Screwdriver.
- Bulb tester (optional).
Step 1 – Checking for Damaged Wires on Glitched Festive Lights
I know you’re keen to know how to test Christmas lights with a multimeter — but first, a quick visual check is necessary.
So, before plugging in the string to see if the lights are working and if there are dead bulbs, take a couple of minutes to carefully examine the whole setup. Naturally, if just one bulb is out, replace it. However, when a sequence of lights or the whole string fails to illuminate, it’s time to begin troubleshooting.
Your initial goal should be identifying torn wires and/or damaged insulation. When not tackled beforehand, issues in the wire can lead to leakage of current, failed illumination, and possibly serious injuries or electrocution.
If you find torn or exposed wires during this process, you’ll have to work on fixing them immediately. Here’s how to do that:
- At places where you identified missing insulation, use some electrical tape to wrap the exposed wire. The electrical tape will act as an insulator and successfully prevent dangerous leakage of the current.
- In case you find a broken wire, carefully mark around an inch of insulation on both sides of the breakage and pull it out with pliers.
- Twist the wires together to make a secure connection, and then solder the joint to make it even more secure. To do this, hold the soldering iron and that specific part of the wire, and once it turns hot, simply apply some solder, and the joint will be sealed. Then wrap with electrical (insulation) tape.
- If that was the only problem with your string of Christmas lights, you can safely plug them into an AC supply, and they should be working without any issues. But if the damaged wires and torn insulation were only just one part of the problem, the lamps won’t light up, or only one section of them will work.
This means there could be a problem with the power socket or plug, which leads us to the next steps.
Step 2 – Checking for a Faulty Power Plug With Multimeter on Christmas Lights
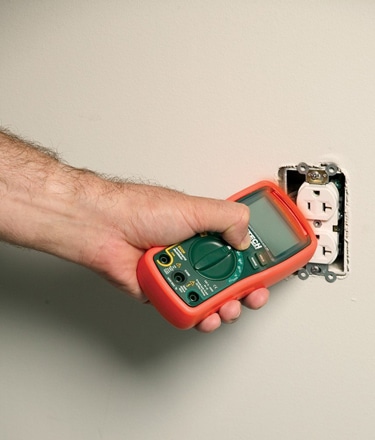
If your Christmas lights visually appear fine, the next step includes checking the power plug socket. It’s finally time to check your Christmas lights with a multimeter!
In some cases, a faulty power plug outlet is the main culprit for the absence of current in the string of lights, and identifying this problem early can save you a lot of time.
Should you be a multimeter novice, I recommend first checking out my articles on How to Use a Multimeter — and the equally useful — What Do Multimeter Symbols Mean?
- Turn on your multimeter and select the AC setting on the dial — often represented as A~.
- Insert one probe into the hot (live) socket contact and one into the neutral — it doesn’t matter which probe is on either contact. Make sure you hold the probes on their insulated covers to avoid electrocution!
- Look at the display screen on the multimeter. In the US, it should display around 120 volts — in the UK and Australia, 220-240 volts.
- If this appears correct, your plug socket is fine. If not, call an electrician as you have an issue with your mains supply.
Here’s a handy video answering the issue of how do you check Christmas lights with a multimeter — where the socket might be a problem:
Step 3 – Check Christmas Lights Plug With a Multimeter
If checking the Christmas lights mains socket didn’t solve your problem, it might be the plug itself that’s the issue.
Here’s how to inspect your plug:
- Open the plug with a screwdriver.
- If your plug has an internal fuse, it needs checking for integrity. Set your multimeter dial to the continuity setting — usually a diode symbol (a black arrow pointing to the right).
- Place one probe on the top end of the fuse, and the second probe on the bottom. If there is continuity, you’ll hear an audible beep. If not, your fuse has blown and you should replace it.
- Visually check the neutral and live wires are connected to the internal contacts of the plug and have not worked themselves loose. If they have, reattach and secure.
Step 4 — Checking for Damaged Bulb Sockets and Bulbs
Now that you have verified that your plug works fine, the socket is functional, and made any required repairs in the wire or fuse, the last part of the process is checking the sockets and the bulbs.
Unfortunately, this can easily turn into a time-consuming job, although that depends on the number of bulbs in your Christmas lights.
This is when a quality voltage tester or clamp meter can also come into play — devices that can detect the alternating AC voltage (the “hum”).
Here are the steps for how to test Christmas lights and sockets with a voltage tester or clamp meter. You cannot test for voltage/current on an insulated wire with a multimeter without stripping back the sheath and applying the probes — which should only be done if all other tests failed to resolve the issue.
- First, you will have to check the bulb wires. They’re the ones that enter and leave every socket.
- Carefully run your voltage tester along the section between each bulb — or surround it with your clamp meter — following it into and out of every socket. As long as your voltage detector is identifying the “hum” — or your clamp meter indicates current — everything is fine.
- In case the device fails to detect the alternating current, you’re dealing with a bad socket/bulb — it’s broken, and therefore the current cannot flow. However, identifying the problematic component is either straightforward or complicated — depending on whether your setup is in series or parallel:
- If your setup is in parallel, the offending bulb or socket will be the one immediately before or after the section of wire that failed the current test. Change the problematic bulb. If this doesn’t resolve the issue, you’ll need to replace the problematic socket.
- Turn off the power and use your wire cutter to trim the wire that comes from both ends of the socket. Take a new socket and connect the wires to it. Don’t forget to secure the whole thing with some insulating tape.
- If your lighting setup is in a series configuration…be prepared for a long job. First, check if all the bulbs are screwed in tightly, starting at one end and gradually working along the line. If this doesn’t fix the problem, you need to remove each bulb one-by-one and check for its integrity with a multimeter (by looking for continuity) or with a Christmas bulb tester — replacing any broken bulbs.
- If all the bulbs are functional, the likelihood is it’s a broken socket. If a visual inspection doesn’t reveal the damaged component, you have two choices. Either strip the wire on both sides of each socket and test every single one for continuity with your multimeter — or decide you have better ways of spending your valuable time and buy a new set.
Step 5 — How To Test LED Christmas Lights With Multimeter
The above guidelines on how to test Christmas tree lights with multimeter relate to bulbs and sockets with traditional filament formats. However, most modern festive illuminations are now LEDs.
LEDs in Xmas lights are virtually always connected in parallel — meaning that if one diode fails, the remainder will still illuminate. These individual LEDs are hardwired, so to replace you’ll need to use a soldering iron. That said, for the amount of time involved and the inexpensive nature of an LED string, you could just purchase a completely new setup.
If however, the whole LED string fails to illuminate, you can still check LED Christmas lights with your multimeter.
Examine for visual damage, mains socket function, and plug using your multimeter as outlined in steps 1-3 above. If this doesn’t resolve the issue, the chances are the problem lies in the controller box.
Incorporating a PCB, resistors, voltage regulator, relays, and a microchip — this box drives your LED system. And, unless you’re an electronics expert, there’s little you can do, apart from replacing your complete LED rig.
How To Troubleshoot Christmas Lights Conclusion
You now know how to check Christmas lights with a multimeter!
As you can see, the whole process is actually very straightforward — you certainly don’t need extensive technical knowledge to fix the broken Christmas lights.
If you’re still unable to solve the issues, don’t give into despair — simply buy a new string on the market. They’re very cheap and should last for at least a couple of years.
I hope you enjoyed this How To Test Christmas Lights 101. If you know someone else who may benefit from learning how to fix your Christmas lights using a multimeter — then feel free to share it with them!
How Do You Check Christmas Lights With a Multimeter FAQs
Can You Use a Voltage Tester for Christmas Lights Problems?
Yes! A voltage tester indicates whether electricity is flowing through a wire. You can use it to identify problematic bulbs and sockets in a Christmas lighting setup.
What Is a Christmas Light Tester?
A tester for Christmas lights is a relatively inexpensive piece of kit that checks individual light bulbs. They can help identify whether your problem lies with a bulb, or in the lighting rig wires and sockets.
Can You Test LED Christmas Lights With Voltage Tester?
You can use a voltage tester to check for the presence of electricity in an LED Christmas light string, but little more. While it can indicate whether power is reaching the individual diodes, it does nothing to identify the problem.
How To Check Christmas Tree Lights for Flashing Problems?
This can be troublesome. Basic Christmas strings use a flasher bulb — usually indicated by a different colored tip to the other bulbs. If you have blinking issues, changing this component usually fixes the issue.
However, modern setups with numerous light-flash settings are controlled by a microchip. Unless you’re an electronics expert, there’s little you can do to fix the problem — apart from purchasing a new set of lights
Is Checking Christmas Lights With a Multimeter Possible?
Yes! You can use a multimeter to investigate the power socket, plug, bulb function (through continuity), and individual bulb sockets. It’s more useful than a voltage tester or standalone bulb tester.
Knowing how to fix your Christmas lights using a multimeter can save you the expense of buying a new set.


