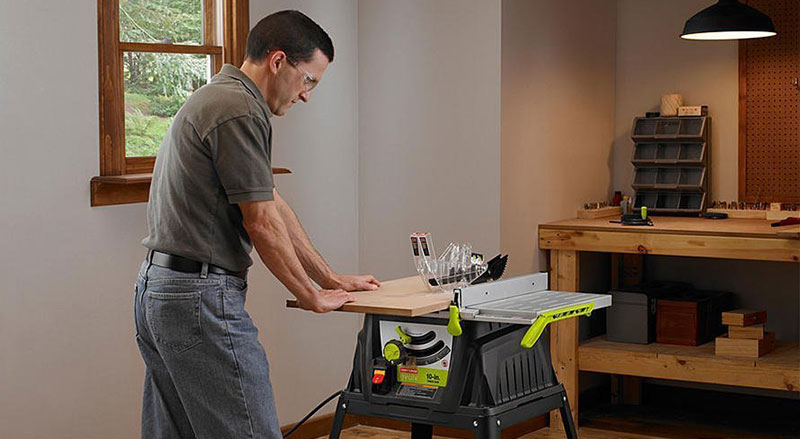
But this is also a very useful machine – its circular blade can do all the hard work, making various kinds of cuts like rabbets, grooves, dadoes, as well a variety of different woodworking joints.
#1 – The Safety Warning
The first thing you should know about this power tool is that it can be hazardous when used improperly. It can and it will leave you with a severe injury if you act carelessly while using it.
That’s precisely why it is so vital to always concentrate on you’re doing and never lose respect for your table saw. Don’t be afraid to use it – just remember that the careless operation leads to the loss of fingers, limbs, eyes, and even life. Keep the nervousness away and pay attention to what you’re doing, and everything will be alright.
#2 – The Parts of the Machine
Let’s take a closer look at the parts of the table saw:
- Table – this one is pretty self-explanatory.
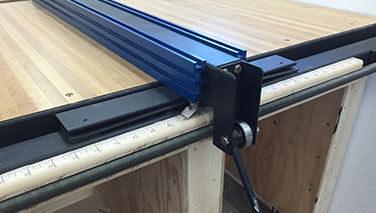
- Fence – this would be a lengthy guide that’s parallel to the machine’s blade. Its purpose is to keep the work at a distance from the spinning blade while you’re making a ripping cut.
- Fence Dog – it’s a lever that locks your fence in place. To secure it in place, one has to tightly press it down.
- Blade – obviously, this is the part that does all the work. There are a few different kinds of blades, but more on that later.
- Blade Insert – this would be an insert that’s supposed to fill the hole which is used for the blade switching. The most commonly used blade inserts have 1/8″ gaps on both sides of the blade.
- Blade Height Adjustment Wheel – as the name suggests, this wheel allows the user to change the height of the machine’s blade.
- Blade Angle Adjustment Wheel – this wheel, on the other hand, will let you adjust the angle of the blade relative to your machine’s table. It comes with an angle indicator.
- Power Button – most power buttons on the table saws are “hinged” push-pull buttons. Pushing turns the machine off while pulling on the bottom turns it on.
#3 – The Types of Cuts
When it comes to table saws, one can perform three standard types of cuts on it – a dado cut, a ripping cut, and the crosscut. Let’s have a look at each variant:
- Crosscut – it’s a cut typically considered to be the one across the grain, even though it can actually be any cut done across the thinner direction of the workpiece. It’s accomplished by using the sled or the miter gauge.
- Ripping Cut – this one is a cut that goes down the length of your board. It’s accomplished by using the fence as a guide to the girth you’d like to achieve.
- Dado Cut – behind this odd name hides a cut that’s most typically used in jointery. One can accomplish it by using the fence or the miter gauge, but there are also some special blades that make these kinds of cuts more accurately and more quickly.

#4 – The Blade Height
When it comes to setting the blade height, there are two different approaches.
- The first one is to set your blade just a little bit higher (around 1/8″) than the top of the piece of wood you intend to work on. The purpose of doing this is the safety – if you slip, you won’t receive a deep cut and will save your fingers. The negative side is that this setup can cause more tear on the board’s bottom and also increase the possibility of a kickback occurring (due to the teeth touching the wood at a horizontal rather than a vertical angle). It’s a preferable method unless you really want to avoid the tear out.
- The second approach consists of setting the blade well above the workpiece’s top part. This method reduces the tear out and the fraying, but it’s far more dangerous. A lot more of the blade is exposed which means that accidental slipping can lead to lethal consequences. To use this method, one needs a lot of experience, as well as 100% concentration.
#5 – The Angled Cuts
Most models of table saws are capable of making two different kinds of angled cuts.
- The first one is done by setting the miter gauge as it is relative to the blade’s plane. To utilize this kind of cut, one has to use his miter gauge to set the wanted angle and then just proceed with the regular cutting.
- The second angle, on the other hand, is relative to the table’s plane. It can be accomplished by tilting over the blade.
On most table saws, the wheel with which you adjust the blade’s angle can be found on the side of the machine, along with the indicator being located on the front of the device. The miter gauge markings, on the other hand, are there for the carpentry level precision. If the angle needs to be really precise, you can use a bevel gauge and a protractor.
#6 – The Fence Adjustment
The fence is a part of the table saw that’s used to precisely cut wooden boards length-wise, and it is adjusted by the lever or the “dog.” If you want to change the width of your cut, you have to raise this lever – the fence will move side to side.

#7 – Changing the Inserts and Blades
Inserts
First, let’s take a look at the different types of inserts:
- Standard Insert – it’s the one that typically comes together with the table saw. It can be used for cutting operations such as the ripping cuts and cross cuts, but only if the waste is large enough not to fall down and get jammed.
- Zero Clearance Insert – this kind of an insert is used for the ripping cuts and the vertical cross cuts. It has to be used when the waste is thin and capable of jamming the previously mentioned standard insert.
- Wide Gap Insert – this insert allows only the trenching cuts and should be used with the dado blades. An important thing here is to make sure that the dado blade doesn’t come into contact with the insert. Before turning the machine one, spin the blade by hand and make sure it’s clearing the back and the front of the wide gap insert.
To switch the inserts, one has to lift the front and use the tab that’s located at the rear.
Blades
Here are some of the most common types of blades:
- The Standard Blade – the standard blade for the table saw is 8-10″ in diameter and 1/8″ wide. The best ones come with carbide on their teeth. This allows them to stay sharp for a long time.
- The Dado Blade – these types of blades are used for smooth and precise trenches and notches in the workpiece.
- The Wobble Blade – these work by utilizing a blade that’s slanted-relative to the table’s plane.
To change a blade, adjust the height to remove the insert easily. Loosen and remove the arbor nut, and then simply take down the current blade.
#8 – The Cutting
The cross cut and the ripping cut are the two most common kinds of cuts performed on the table saw. Here’s how to accomplish them correctly:
- Cross Cut
To accomplish a cross cut, one has to first take an appropriate tool and then make a measurement while leaving a mark on the workpiece. Don’t use both the fence and the miter gauge at the same time, as that can cause the dangerous binding. Once you’re done with measuring and marking, you can set your blade’s height, line it up to the mark, and turn on the saw.
Smoothly and slowly advance the workpiece through the blade while holding the board as firmly as you can. Once you’re done, turn the machine off, and be careful not to stand in line with the loose material around the table’s blade. The blade could still pick up some wood and throw it back at you.
- Ripping Cut
Once you’ve adjusted the blade height and the fence, turn on the saw and put your workpiece against the fence. Try not to use excessive force while keeping the workpiece against the fence, as that can be very dangerous and could also cause inaccurate cuts.
Slowly advance the board through and past the saw, and turn the machine off once the job is done.
small adjustments to your workpiece.
Conclusion
That’s it – now you finally know almost everything about this powerful tool and how to use it in a safe and productive way. Remember to perform regular maintenance on your table saw and to always wear all the necessary safety equipment, and your woodworking sessions will become a joyful experience.


