If you’ve never painted the outside of a house before, you may find it to be quite a different task from painting your interior walls or furniture. You need to take a lot more into consideration when preparing to paint the outside of your home. Everything from the type of paint you use to the method of applying your paint needs to be thought over.

We’ve taken a look at some of our favorite tricks and tips for spray painting exterior walls effectively.

Spray Painting Exterior Walls
While some homeowners still prefer to use a paint roller, we find that using a hydraulic or air-powered paint sprayer can help you to get the job done a lot more quickly. Plus, the paint sprayers leave smooth, symmetrical coats each time you go to paint.
If you want to go the extra mile, you can invest in one of our favorite Graco products to help you achieve an even nicer finish. Of course, there are several great paint sprayer options on the market, and you can choose whether you want an airless or air-powered sprayer to paint your exterior walls.
The project of painting exterior walls can be a fun and exciting endeavor, especially when you are painting the walls of your own home. Just make sure that your project and paint materials have been approved by your Homeowner’s Association first – you don’t want to go through all the trouble of setting up your paint project if it’s at risk of getting taken down!

The Advantage of Paint Sprayers on Exterior Surfaces


There are a number of advantages to benefit from when you use a paint sprayer on your exterior walls. Not only is the sprayer a powerful tool that can spit out paint like a pro, but it will also save you tons of time and physical pain. Imagine how tedious it must be to use a paint roller on the entirety of your house. Talk about a pulled muscle! Instead, you can use a paint sprayer to easily glide your hand along your walls until you’ve achieved the color you want.
s
Remember to be safe! It’s important to take safety precautions even while using a safe paint sprayer. While they are simple pieces of the equipment, they are still strong power tools that can become dangerous if left in precarious situations. Make sure to wear protective gloves and headgear while using your paint sprayer. If you are using an airless sprayer, make sure nothing is blocking your motor, which would cause it to become overheated and dangerous. Turn off all nearby appliances so you don’t risk an electrical fire.

Other Pieces of Equipment You May Need


Once you’ve gotten your Graco or preferred brand of paint sprayer, there are a couple of other items you may need to cross off your checklist before you can start your exciting exterior wall painting project.

Our Tool Nerds staff thought about a few of the items they typically use while taking on a project like this. Here are some items you may need:

● Enough paint and stain in your preferred color to cover the whole exterior
● Empty buckets for waste disposal and paint storage while reloading your paint sprayer
● Ladder with multiple height adjustments
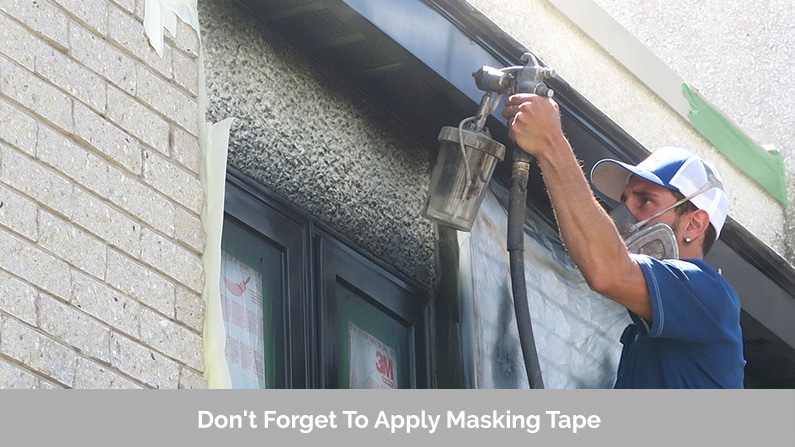
● Masking tape to block off the sections of your house you don’t want painted
● A number of different spray tips for covering all areas of your home with ease (wide tips are great for large areas, while narrow tips can cover the details without making a mess)
● Stir sticks to properly mix up your paint
● Tarps and sheeting to protect your ground and the areas of your walls that you want to protect
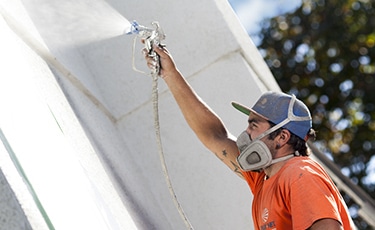
● Spray shield to protect your face and arms
● Rags for cleanup
● Paint brushes and paint rollers for additional touch ups
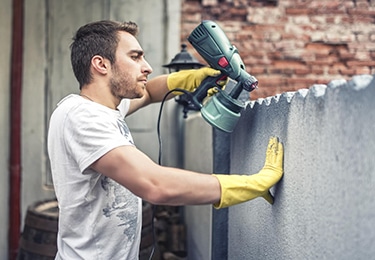
● Safety glasses and gloves
You can also invest in some tip extensions, which some brands provide upon purchasing the paint sprayer. These tip extensions allow you to get into those hard-to-reach spaces and coat your walls without having to break out the paint roller. However, if you can’t find some tip extensions, you can always use a paint brush with ease.

Preparing to Paint


Before you begin, you need to properly prepare your area. You should move your outdoor furniture far away from your walls that are to be sprayed. You might not want to get paint splattered all over your barbecue grill or expensive lawn chairs! Move them to a safe area, or even inside the garage throughout the duration of your project.
Apply Masking Tape Before Spray Painting
Take a good look at the surfaces you don’t want to paint. Apply plenty of masking tape and other coverings to these areas so that you don’t get paint on them. This is the most tedious part of the painting process, but it certainly pays off when you’re all done. You’ll have a beautiful exterior with a stark contrast between the areas you did and didn’t paint, which often leads to aesthetic beauty and great design choice.

Wash Before You Spray


It’s important to pressure wash the entire area before you paint it. You can’t paint on top of a dirty surface, as the dirt will cause the paint to clump and it may create dark stains in undesirable areas. Remove any peeling paint or mold that has begun to form around the walls of your home.
After you pressure wash your walls, you want to make sure you give your walls time to dry. This can take up to a few days, so be sure to wash your walls a little bit in advance. That way, you aren’t rushing come paint day.

The Spray Painting Process


Now, you’re ready to spray paint! This is the most exciting part of the process, and it can even be the quickest part of the process if you have an experienced arm and a fantastic piece of equipment.
Select a paint tip that not only works well with your house, but with your surface and even with the type of paint you want to use as well. That way, you can focus on mixing your paint one surface at a time.
The Spray Painting Process
If you have no spray painting experience, we recommend that you start with a large, flat surface. The side of the house is a good idea, as opposed to the front. That way, you have yourself a little bit of wiggle room, and your margin for error won’t be quite as substantial. Give yourself time to play around with your pressure settings as you get used to how the paint comes out of your sprayer.

Always start with the top of the surface, and work your way down. Since paint tends to drip down, it makes sense to start up above.

Don’t miss out on spraying the undersides of your eaves – that’s always an invisible spot!

The direction of your spray depends on the construction of your walls. Do your walls have an obvious horizontal board pattern? If so, you’ll want to follow the grains as accurately as possible. Usually, you’ll want to follow along with the length of your exposed woodwork or trusses for the smoothest coat.

Work in Sections


Remember, you don’t have to finish everything all at once. It’s okay to give yourself some time to section off certain areas of the home. Don’t risk getting sunburned or having aching muscles at the end of the day!

Section off the parts of your exterior that you can easily reach. Leave the parts you can’t reach for the tip extensions or final touch-ups as soon as everything else is done and dried.

Work in Sections
Think about painting your surface much like constructing a jigsaw puzzle. You want to find the corners and edges first, right? The same mentality can be applied to spray painting your surfaces. You want to band the edges first, so you can create a boxed area for you to paint in. That way, you know how to confine your spraying efforts to just one section at a time.

For a smoother paint, keep your tip 12 inches away from the surface at all times. That is a decent amount of room for your paint to spray out and cover all areas of the surface evenly.

Don’t Forget to Clean Up!


Of course, once your paint is applied to your preferred sections, you must wait for it to dry completely. Just like powerwashing, this can take up to a couple of days. Don’t attempt to remove any tape or trimmings until you are confident in the dryness of your walls.

Slowly, you can begin to remove coverings from your bushes and tape from your walls. Move your outdoor furniture back to its proper location and replace your light fixtures if you removed them during the painting process.

Don’t forget to clean your paint sprayer as well! If left untreated, paint can become flaky inside the tubes of your equipment, rendering it useless for the next time you want to paint. Take good care of your equipment and it will take good care of you!