We’re here to help you avoid the procrastination factor and start spraying. After all, the sooner you begin, the sooner you’ll achieve professional finishes.
With numerous time-saving and productivity enhancing features using a Graco paint sprayer for the first time can feel intimidating. This guide aims to remove those deterring factors and get you started.
Let’s begin by reviewing the types of Graco machines available.
Types of Graco Spray Guns
Since it’s unfeasible to include a list of all Graco products here, here’s a short description of the most popular types of Graco spray gun.
Graco HVLP Paint Sprayers
The FinishPro line from Graco is an innovative line of turbine-powered HVLP sprayers. Designed for woodworkers and contractors after tools that provide some top-notch results, these units are ideal for small and midsize projects.
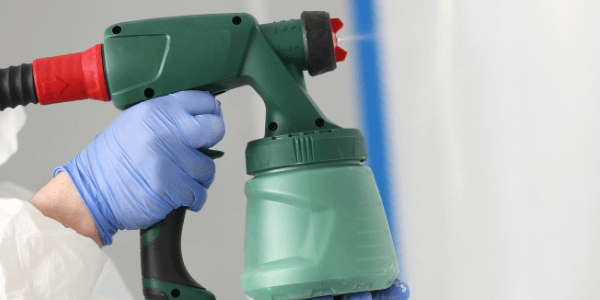
This group of spray guns all include a stand-alone, ground-based turbine (no compressor is required). The line can be further separated into three distinct categories: Standard, ProContractor, and ProComp.
The Standard Series includes all the fundamentals you expect in a paint sprayer, while the ProContractor Series includes all Standard Series features but offers more when it comes to productivity and convenience. Finally, the ProComp Series offers twice the capacity and can handle large to medium jobs.
If you’re an occasional DIYer, you probably don’t need all the features included in units such as the Graco 9.5 ProContractor HVLP spray gun.
Instead, you may find that the Graco Standard Series FinishPro 17N263 is a better fit.
Graco Airless Spray Guns
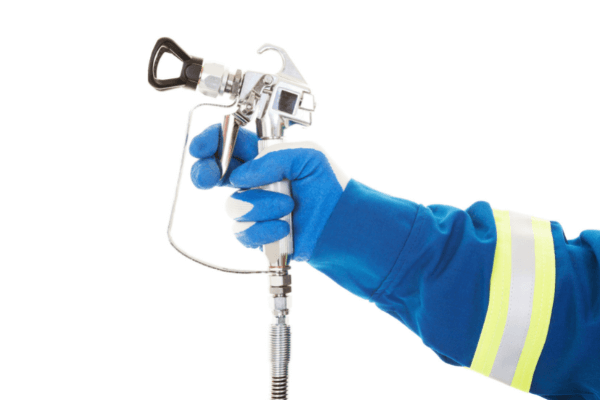
A range of handheld cordless and corded airless sprayers, which are extremely rare in the industry, rounds out Graco’s airless range. There’s something for every experience level, from rental shop owners (Graco Rental Pro 230) through to newbie painters (Graco Pro 210ES).
How To Use a Graco Airless Paint Sprayer to Paint Interior Walls
Learning how to use a Graco paint sprayer properly before revamping your interior walls will set your results apart. It will also make the entire process an efficient affair.
Pro tip: Using thick paint? With a unit like the Graco Magnum Project Painter Plus, you can avoid thinning the coating before you start.
What You Will Need to Follow This Tutorial
-
- Graco paint sprayer.
- Suitable size fluid nozzle.
- Coating.
- Old cardboard box.
- Five-gallon bucket.
- Stir sticks.
- Goggles, face mask, and coveralls.
- Plastic sheeting and drop cloths.
- Masking tape.
- Step ladder (if a large project).
Step 1: Prepare Your Work Area, Yourself, and Coating
Step 2: Set Up Your Sprayer
Step 3: Testing Your Sprayer
Continue to test and adjust your paint sprayer until the edges of the fan pattern appear blendable and soft. Once you’re satisfied with the result, you are ready to move on to step four below.
Step 4: Spraying Your Wall
Step 5: Finishing Up
How To Prime a Graco Paint Sprayer
But following on from that word of caution, devices such as the Graco Magnum X5 make priming easy with a simple PushPrime feature.
What You Will Need to Follow This Tutorial
-
- Paint Sprayer.
- Two buckets, one for paint and a metal one for waste material.
- Your chosen coating.
- Power supply.
Step 1: Pump Priming
Step 2: Hose and Gun Priming
4. Use the Sprayer on the Lowest Power Setting
Why? Because some units tend to deliver increased overspray on higher settings. What’s more, unless your arms can sustain moving consistently at a speedy pace — when operating at high power — you’ll also end up with undesirable paint pools to clean up.
The best way to avoid these issues is to invest in a paint sprayer like the Wagner FLEXiO 5000, which has variable X-Boost power and pressure output. This enables you to start your project on the lowest power setting and gradually build it up — meaning the coating is propelled adequately and according to the viscosity.

5. Use the Correct Nozzle Size
As my How To Find the Right Paint Sprayer Nozzle guide explains, it’s not a case of one size fits all when talking about tips. For example, stains and sealers need a small diameter orifice, as is found in the Husky Siphon Feed H4930SSG Spray Gun.
In contrast, heavier-duty mediums, such as latex and epoxies benefit from a larger sized opening and is demonstrated in the Graco Airless 17m363 sprayer. On the topic of airless sprayers vs HVLP (high-volume, low-pressure) units, the diameters of the tips (either expressed in inches or millimeters) do not relate mutually.
As airless machines operate at a high pressure, they can get away with a narrower opening. Conversely, turbine-driven HVLPs work at the lower end of the PSI scale and therefore require a relatively larger tip diameter — making them adept for small and midsize projects.

6. Ensure the Machine is Properly Maintained
Another way to angle for an easier painting clean up is by ensuring that your spray gun is properly maintained. Although the techniques may vary depending on whether you own an HVLP or airless unit, the fundamentals remain the same.
Also, when completed regularly, this task will assist in a more simplified clean-up post job (as the sprayer will work more efficiently with no leaks). Plus, it will also guarantee the longevity of your device — saving you money in the long run. Let’s take a look at the key components that you need to pay attention to.
In the case of an airless spray gun, the first part to check is the heart of the device — the pump. The simplest way to keep track of when you need to service the pump is by keeping a logbook of gallons pumped or hours operated — similar to the oil in a car.
When the time comes, you need to check the general rod, pump balls, seals, and packings for signs of wear and replace as necessary. Also, check the uptake and spray gun hose for leaks, kinks, and cracks.
Now to focus on some aspects that are similar in airless and HVLP sprayers. You also need to have a look for signs of deterioration at the fluid nozzle. If you’re unsure what nozzle wear looks like or how to replace a tip, read through my comprehensive How To Find The Right Paint Sprayer Nozzles article.
As a further generalization, check all threads, washers and gaskets are in good condition and repair or replace as required.

7. Choose an Easy-Clean Machine
Other examples of forward-thinking from manufacturers come in the form of the PowerFlush feature that’s found in the Graco Magnum X19. This approach allows you to attach a garden hose to the unit, which rapidly flushes the system for you.
Pneumatic (or compressor-driven) guns are also not excluded from this section. Many come as a complete kit, like the Sprayit LVLP SP-33310K — that arrives with a wrench, which allows for simpler dismantling.

Conclusion
Concentrate on preparation and choose a machine with features that streamline the clean-up process. Additionally, use methods that make coating dilution, stirring, and adding to the machine a drip-free process. Regular maintenance is also paramount to mess-free rapid project conclusions.
Hopefully, you’re all set for an easier painting clean up and if you found this guide helpful, please share it with your fellow DIYers.
Easier Painting Clean Up FAQs
Q: How Do You Clean Your Sprayer up After Painting?
You need to ensure that you complete a thorough clean up of your paint sprayer after painting. If you’re not sure where to start, check out How to Clean a Paint Sprayer.
Q: Should Painters Clean up After Themselves?
Yes. Unless you’re lucky enough to employ someone that carries out this task for you (which many of us aren’t) — clean-up is part of the process. Hence, will have to be completed by the DIYer — meaning, you.
Q: Is It Ok to Rinse Paint Down the Drain?
No. Try to refrain from pouring paint and paint rinse water down the drain, over time it will cause your plumbing to clog up. Plus, think of the negative environmental impact it will have.
Make sure you dispose of paint waste in a responsible manner. Check with your local authority for any specific regulations or recycling schemes in your area.
Q: What Do You Clean a Spray Gun With After Painting?
The medium that you clean your paint sprayer with after use is determined by what type of coating you use in the first place.
Water-based coatings can be cleaned with fresh water and a spot of dish soap (if permitted by the manufacturer). Whereas oil-based paints need to be cleaned with either thinners or mineral spirits.
Q: Do You Have to Clean Your Paint Sprayer After Every Use?
Yes, it’s super important to clean your paint sprayer after every use. Allowing coating to dry in the unit can cause clogs in the system — which can lead to major problems further down the line. That said, if you’re in this predicament, check out my How To Clean a Paint Sprayer guide.
Q: What Do You Use To Clean A Spray Gun?
Aside from the aforementioned cleaning fluid, it’s also worthwhile possessing a small soft-bristled brush to help you remove stubborn coatings.


